Machine Knitting Guide
Resources and tutorials for machine knitting used in this course.
This page will guide you through the steps of using the knitting machine in chronological order. Please treat it as a reference that you can use when you forget about something; the machine training session is designed to cover everything here.
Table of contents
The Knitting Machine
Wesleyan has a SHIMA SEIKI WholeGarment knitting machine located in the Textiles Hub (Exley 5th floor, Room 509b). The machine has multiple gauges and the one at Wesleyan is 13-gauge, meaning that every inch has about 13 stitches. There are many other manufacturers (e.g., STOLL, Brother, Kniterate) and types of knitting machines (e.g., flat, circular, X-bed), and they all have different fabrication constraints or design systems. What we will learn in this course about the fabrication applies to this specific type of V-bed knitting machine, but the higher-level pattern design or programming applies to all kinds of knitting, including hand knitting.
Preparing Knitting Pattern
In this course, helper scripts will be provided for generating .dat files, which are file types accepted by the SHIMA SEIKI SDS-ONE system. They essentially encode an image where each color maps to some meaning that can be understood by the system. You will program in Python to generate some design following the assignment instructions, and will not need to worry about how it gets converted into .dat.
Later in the course, we will also learn about how to program in knitout, which is a programming language that is kind of like human-readable knitting machine assembly code. You can learn more about it from the official documentation page.
In general, this course will provide the scripts needed to generate knitting patterns and before going into the Textiles Hub, you will bring a USB stick or your laptop that has the .dat files and load onto your own USB stick or the USB stick for common use in the Textiles Hub.
Turning On/Off the Machine
One addendum to this page is that when turning off the machine, you need to do a long-press on the small power button (which is called the drive power switch); then you turn counterclockwise the bigger red switch to completely switch off the machine.
Threading the Yarn
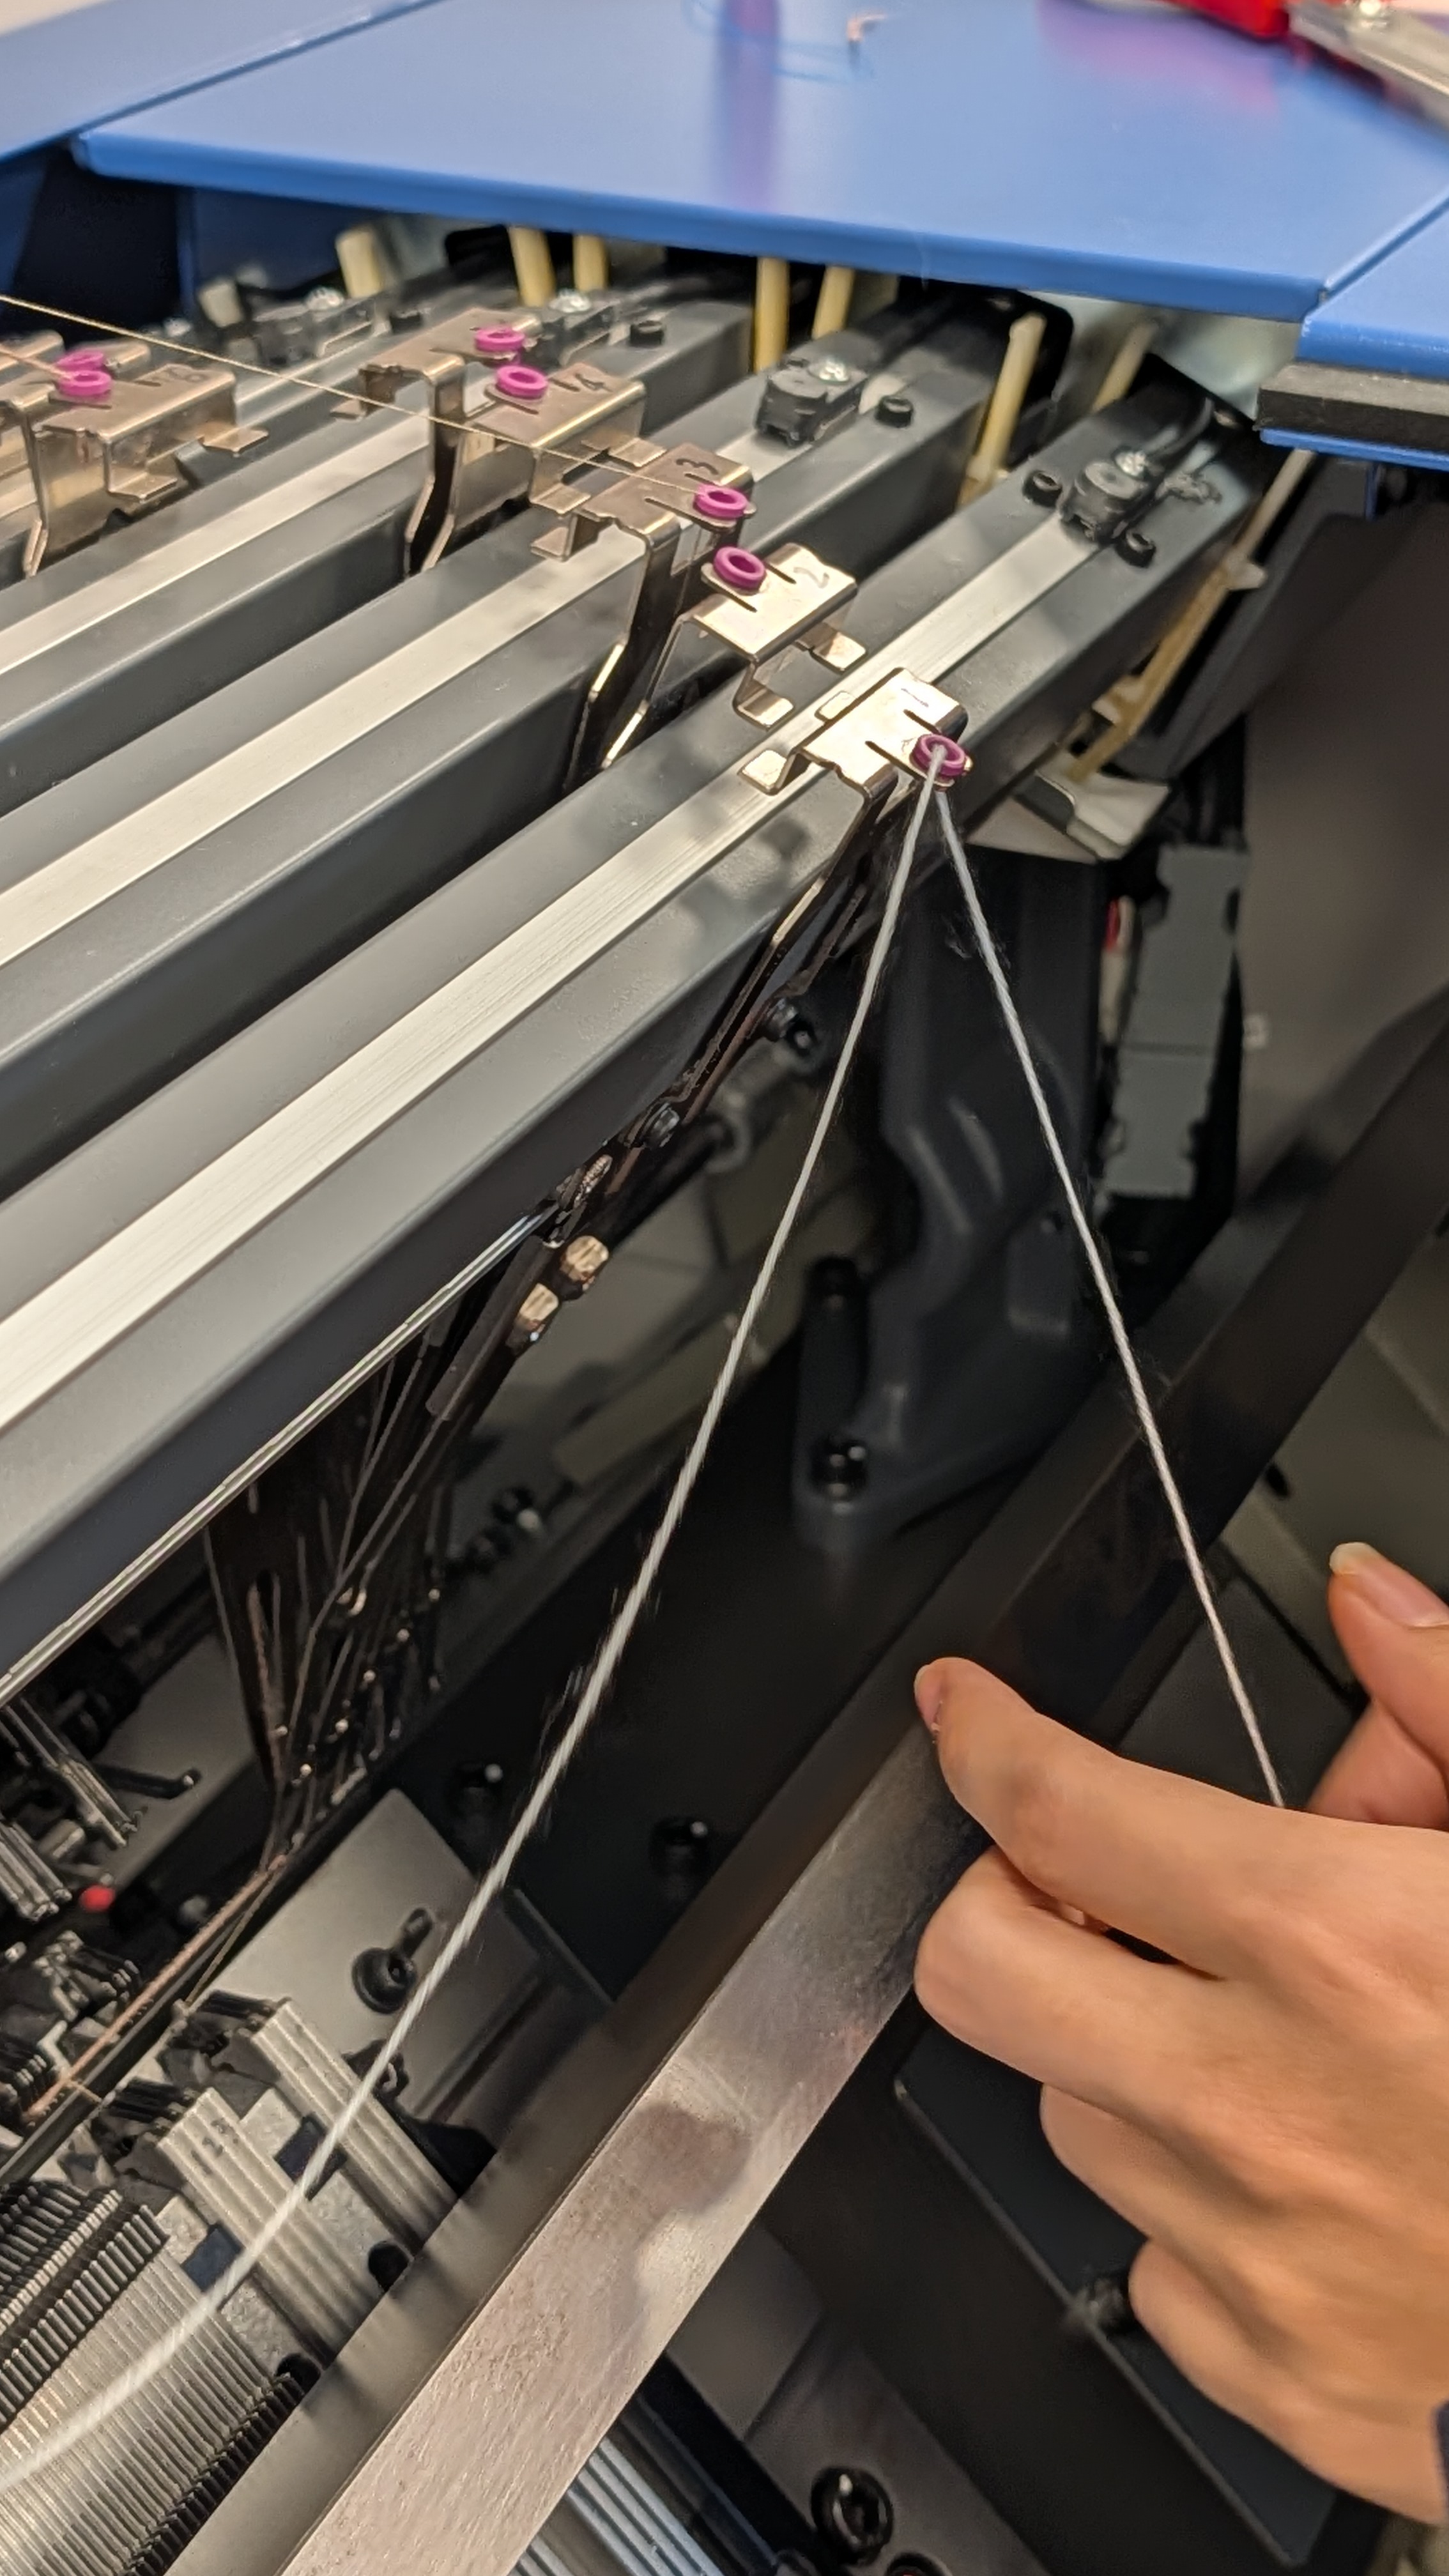
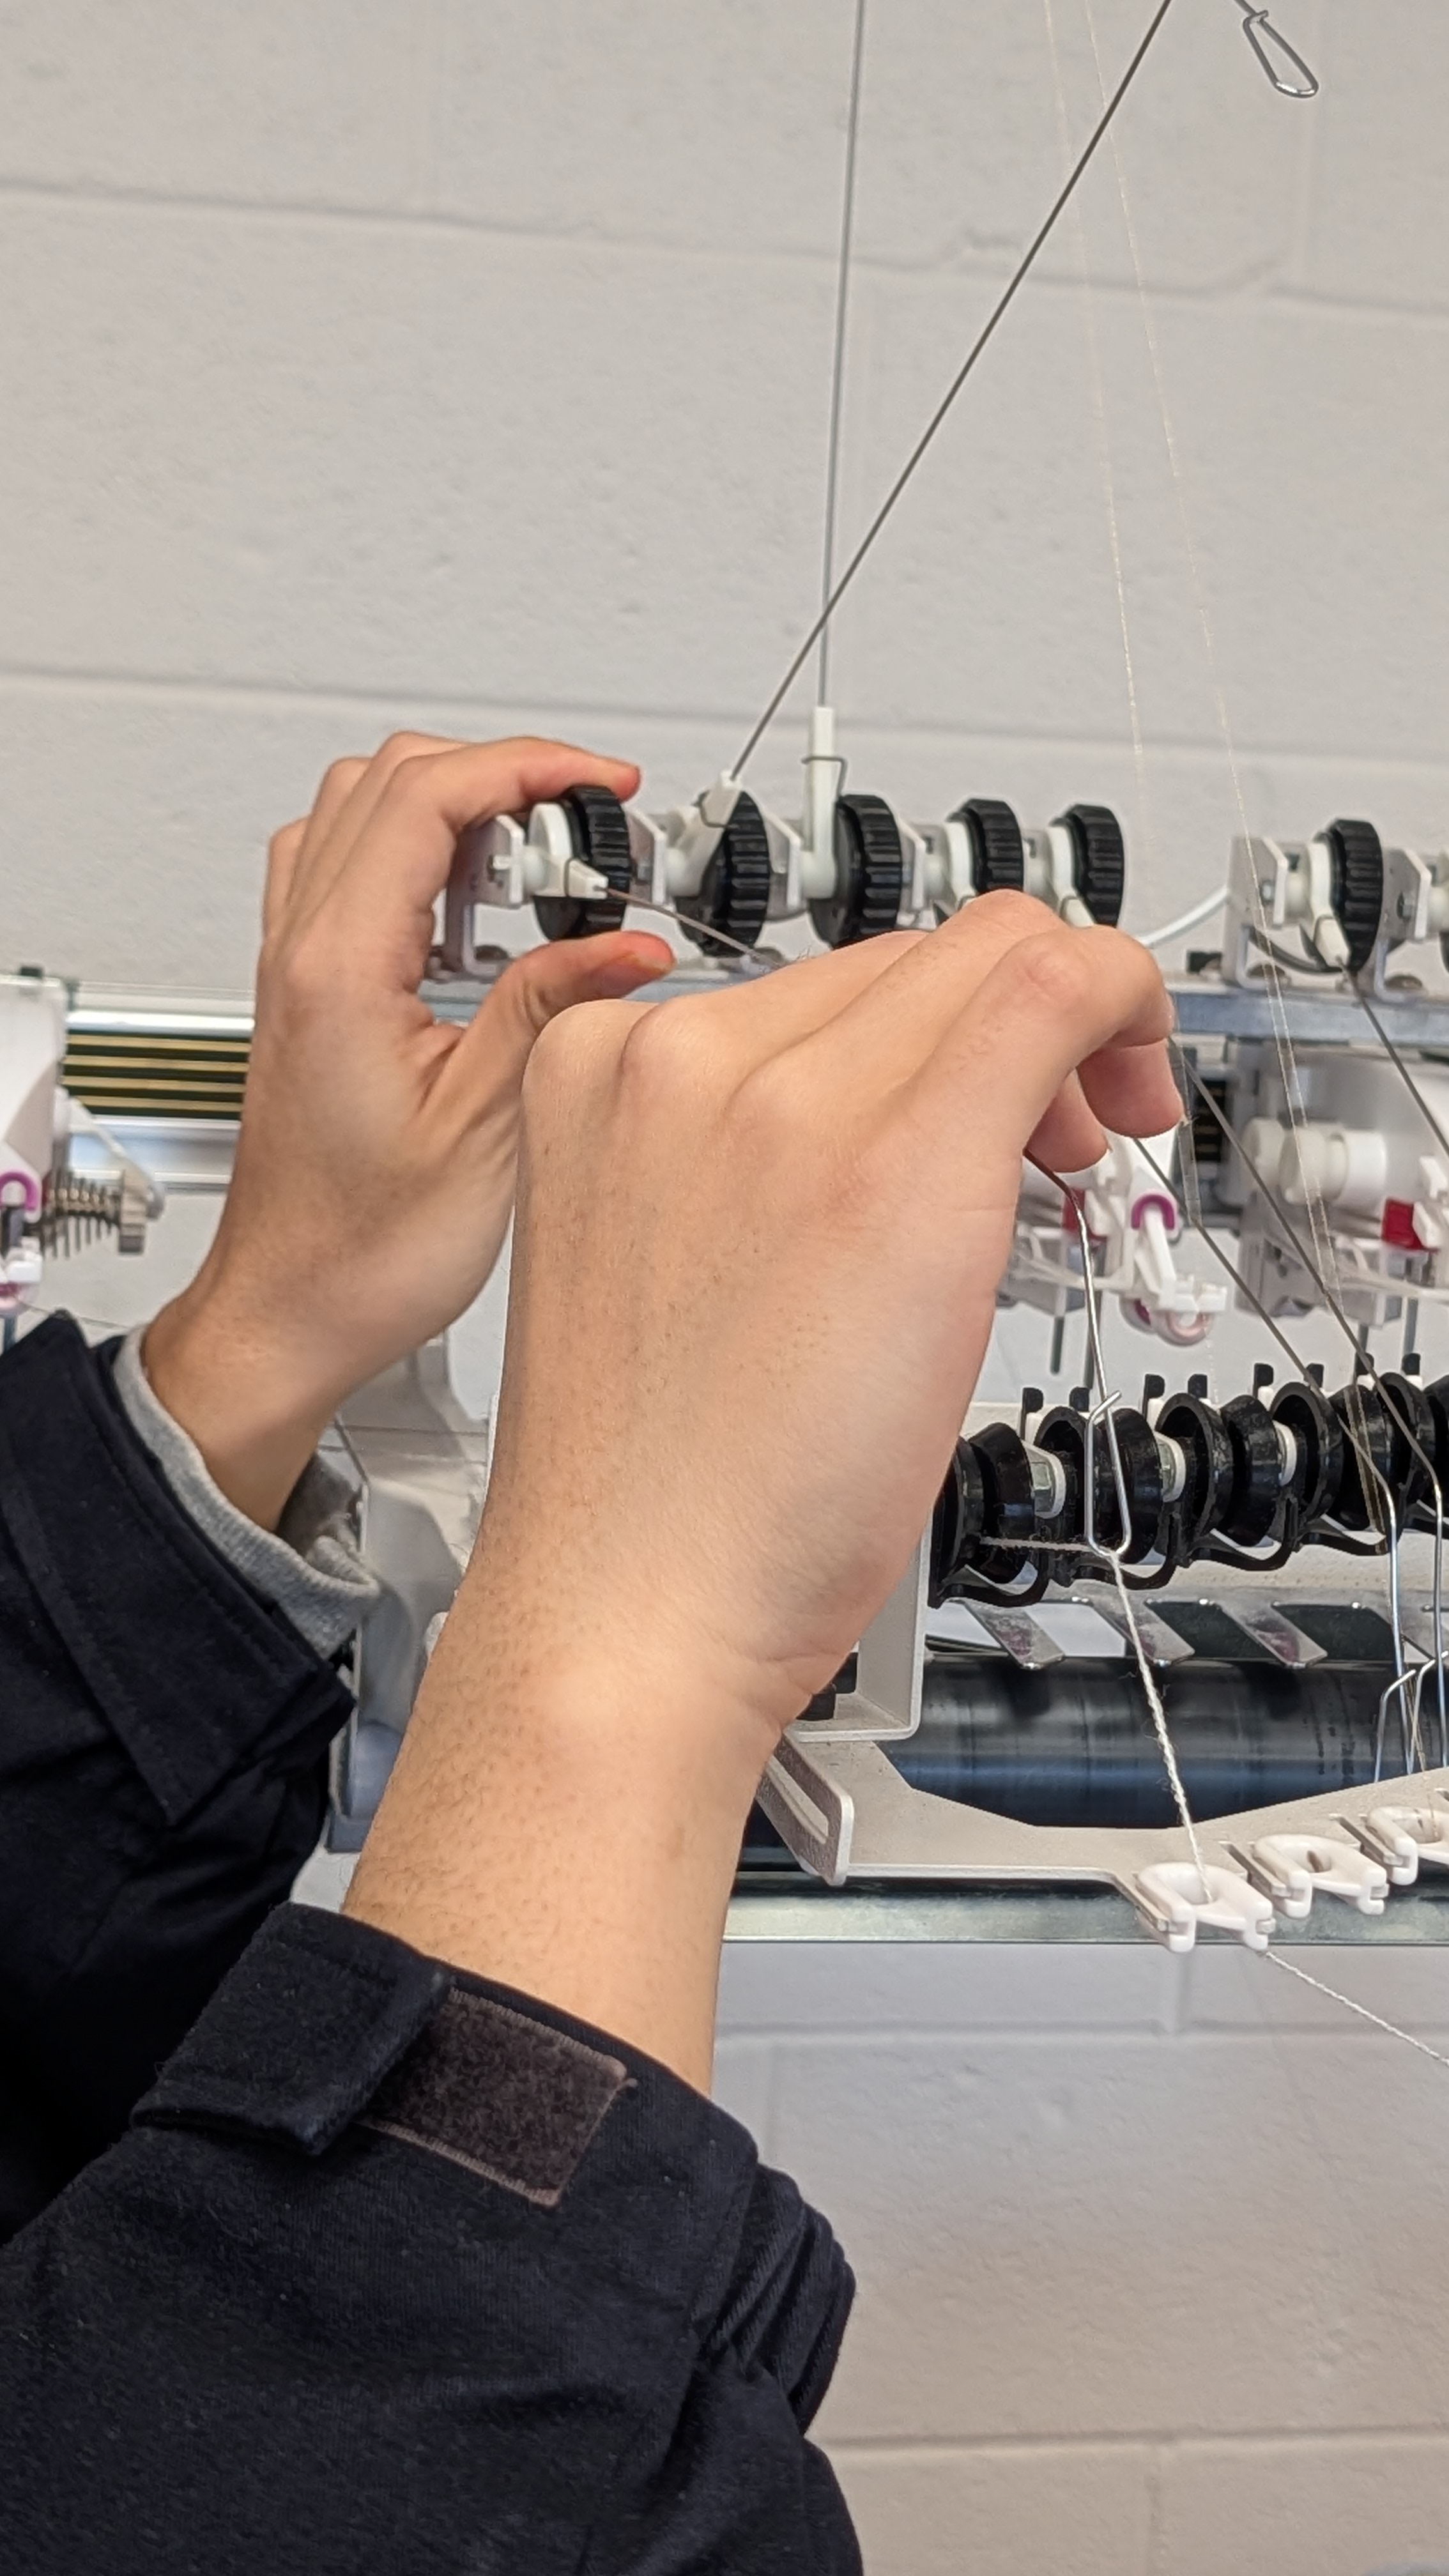
It is usually easiest to thread the yarn without turning on the machine yet. There are 10 yarn carriers on the machine and each can hold onto one yarn thread (or multiples twisted together if they are too thin). The back rack can hold a lot more cones of yarns. Make sure to align the yarn cones to be not too far away from the position you will thread the yarn into. The yarn position and which carrier it corresponds to are indicated by the numbers written on the machine and the yarn carriers. This arrangement keeps yarn threads from entangling with each other when knitting.
Make sure to continue threading the yarn into the yarn carrier. The steps are as follows:
Click to expand step-by-step threading instructions
-
Guide the yarn thread through the top hole of the carrier.
-
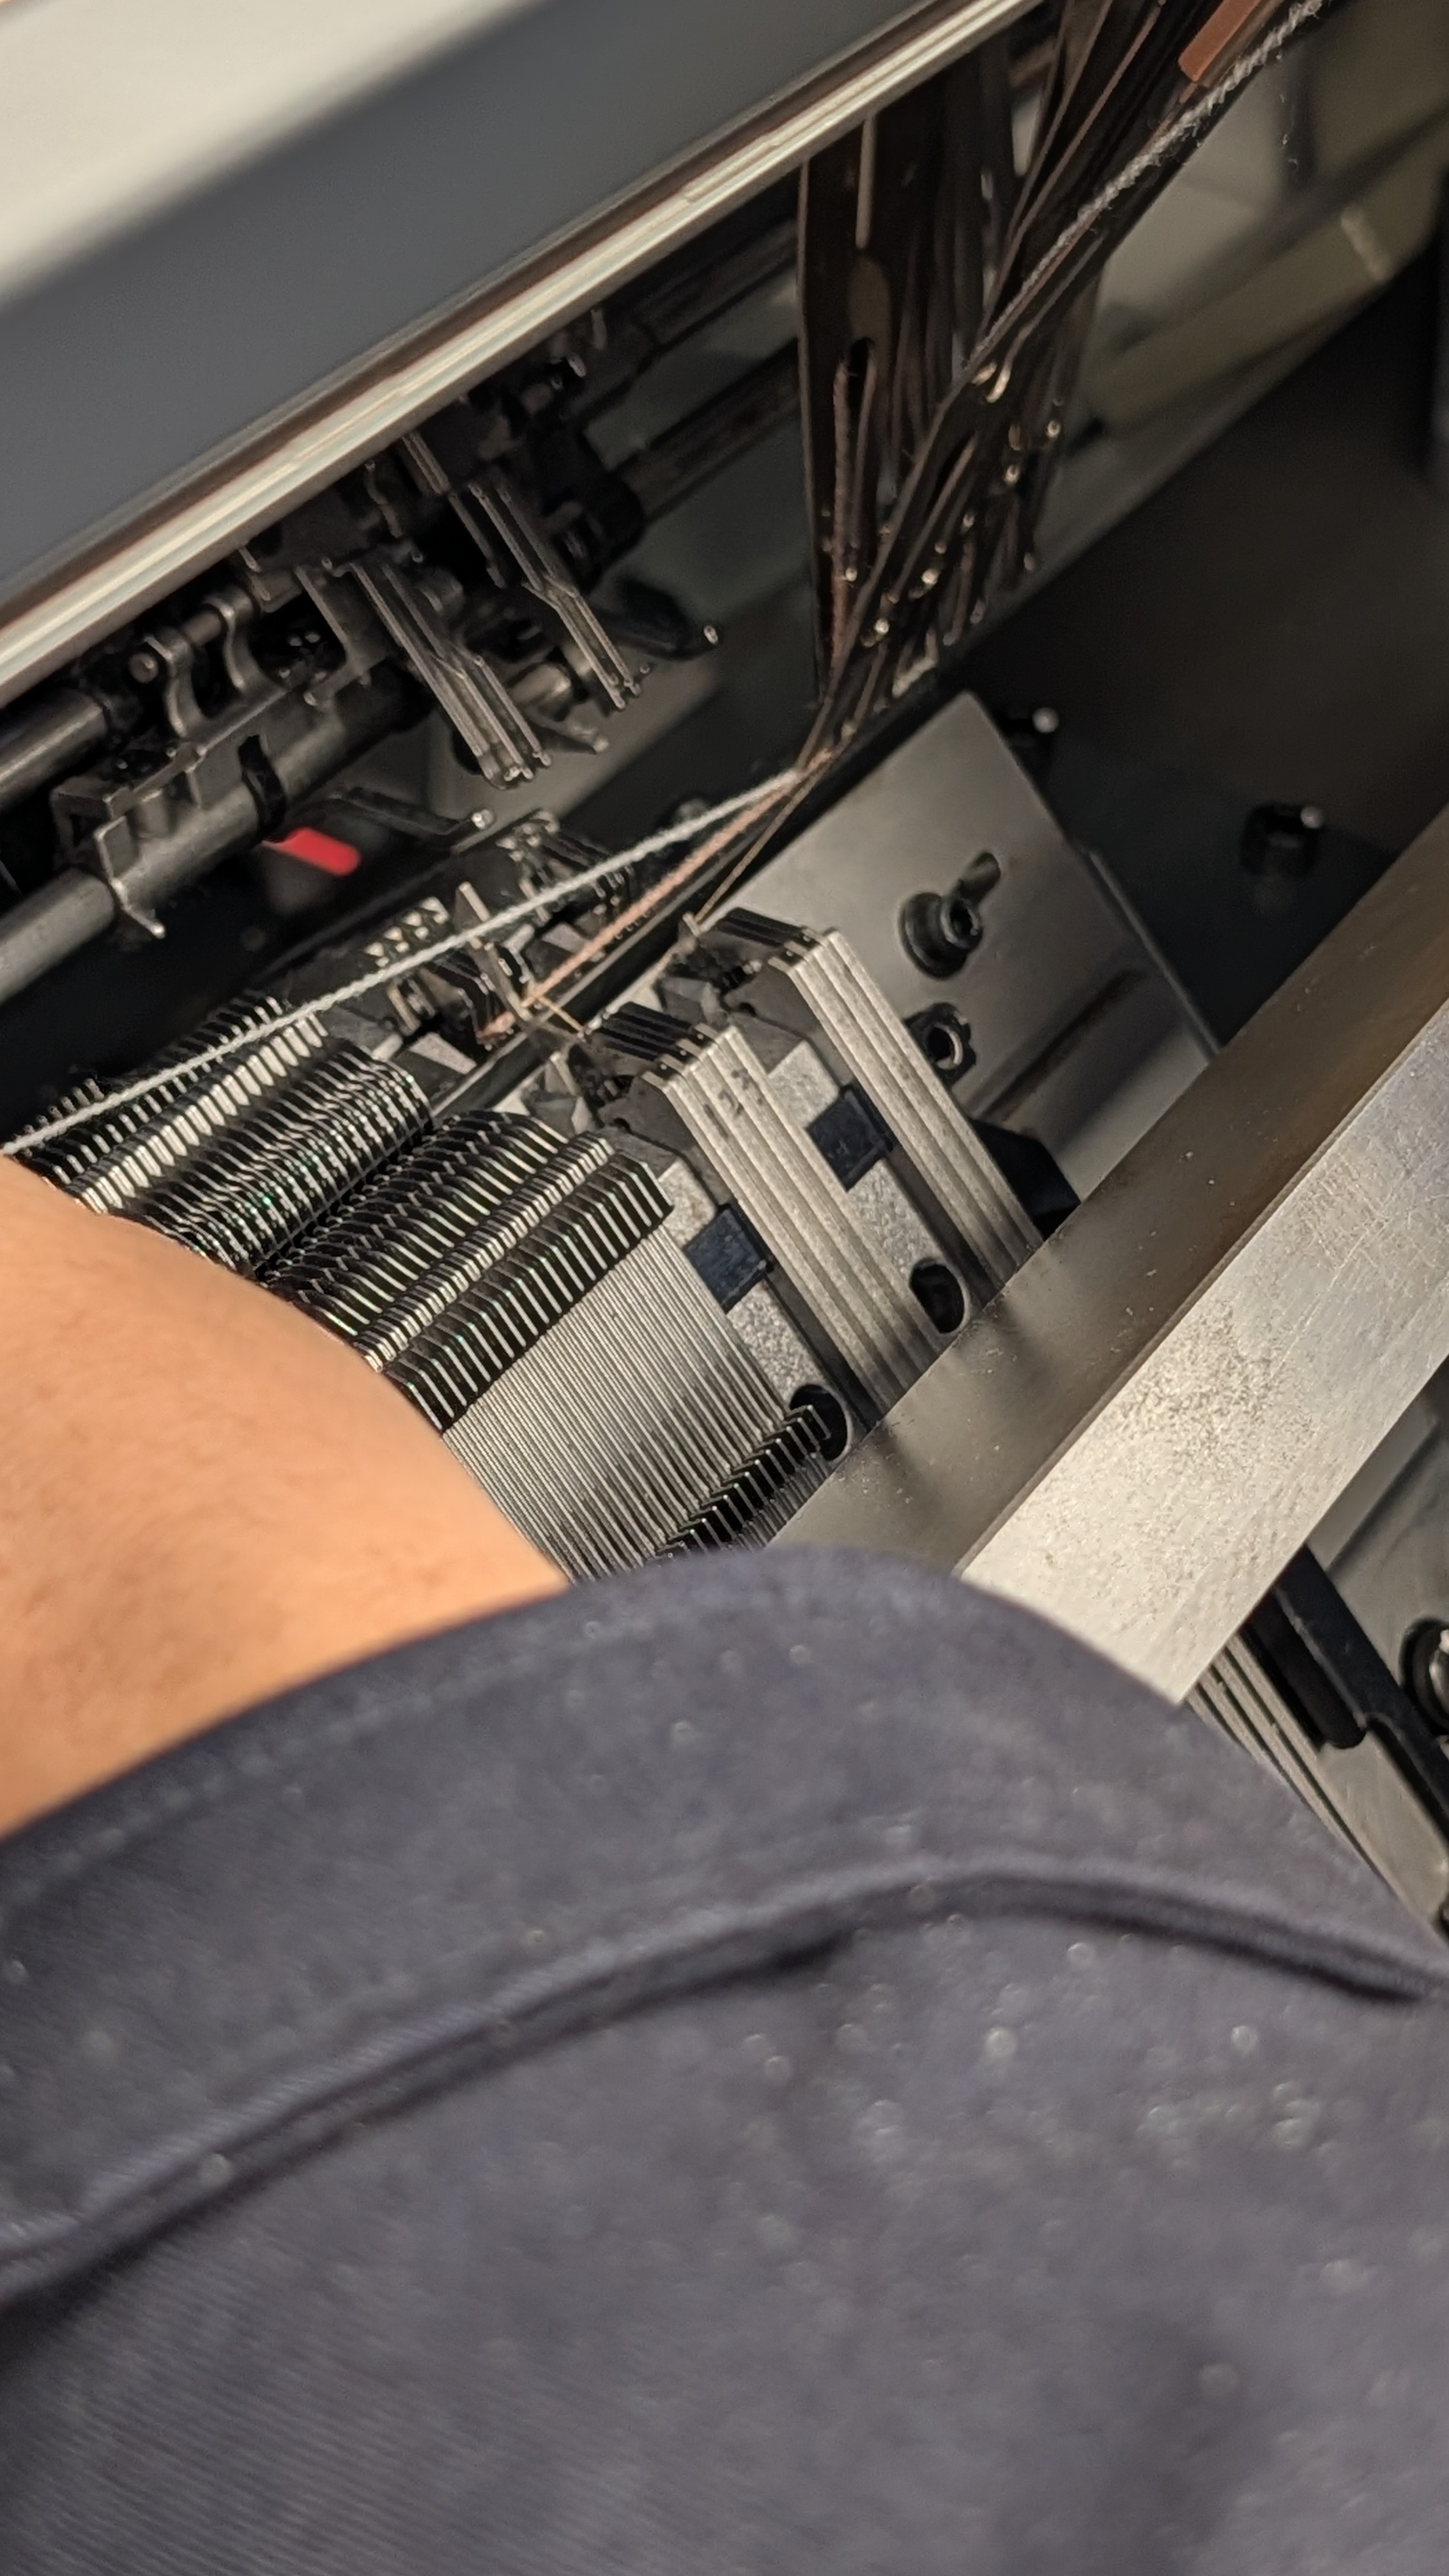
Guide the yarn thread through the bottom hole of the carrier. This step usually requires using a tiny blue threader. The yarn carrier is flexible and can be slided along the bed range, so to pull the thread through the bottom hole, you can slide the carrier out a bit to the left, and then flex the metal so that there is some space to pinch the thread/threader and pull on it from the other end. Don’t forget to slide the carrier back to the right side.
-
Clamp the yarn with the corresponding yarn selector hook. The yarn selectors are also arranged in a way to correspond to the carriers. The front bed has 1-5, and the back bed has 6-10. The selectors are arranged in the following fashion:
(from left to right, front bed, standing in front of the front bed)
- group 1 cutter, yarn 1 selector, yarn 2 selector, yarn 3 selector ( some space ) group 2 cutter, yarn 4 selector, yarn 5 selector (from left to right, back bed, standing in front of the front bed)
- group 1 cutter, yarn 6 selector, yarn 7 selectorm, yarn 8 selector ( some space ) group 2 cutter, yarn 9 selector, yarn 10 selector
Push up the selector pin (the little metal piece that protrudes above the level surface):
Then push up the released selector using that newly released pin, and you should see the hook come above the needle bed:
Then push down the selector pins in reverse order to secure the thread, and then similarly push up the cutter selector pin and then cut the thread.
-
Now you should go back to put the yarn on tension.
Compile the Pattern in KnitPaint
The SDS-ONE software provides many interfaces, and we will only work with KnitPaint here.
Follow through this tutorial only for the first two steps; the rest are for using the templated knits. For this course, we will actually load the .dat pattern files from a USB stick.
After you open up KnitPaint:
Click to expand step-by-step KnitPaint instructions
-
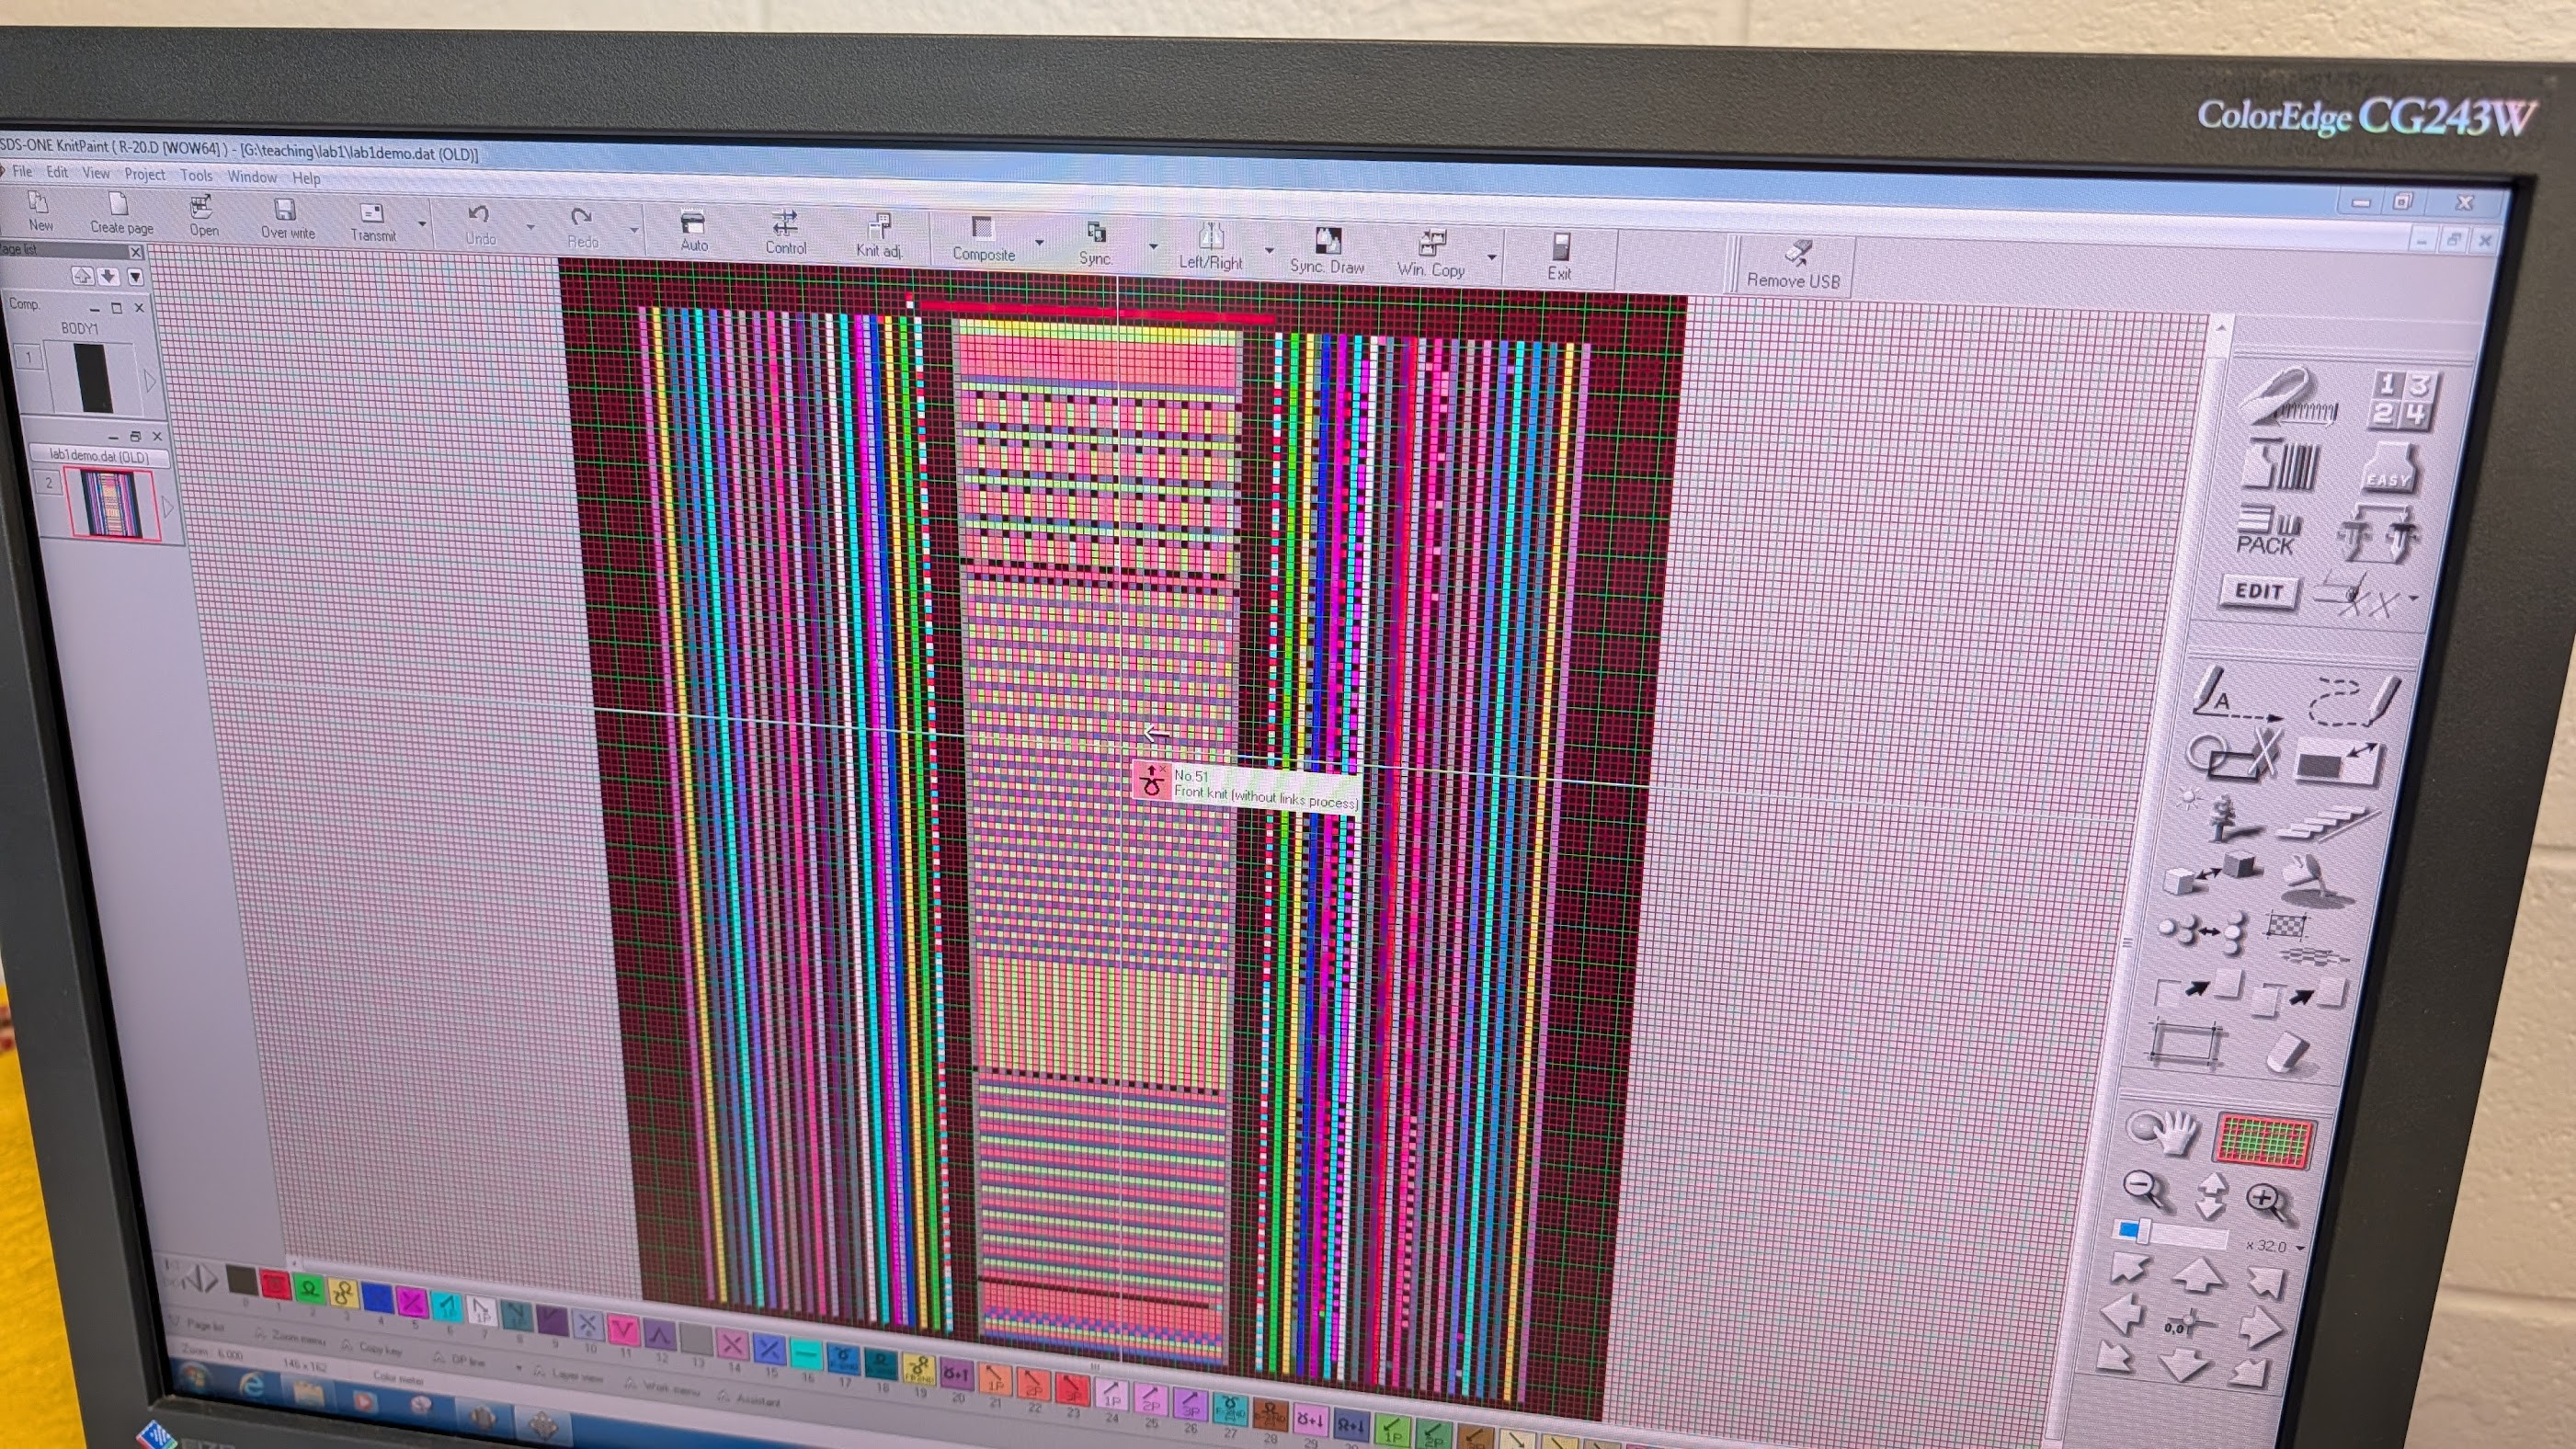
Double click on your
.datfile to open it up (photo below shows what you see after double clicking).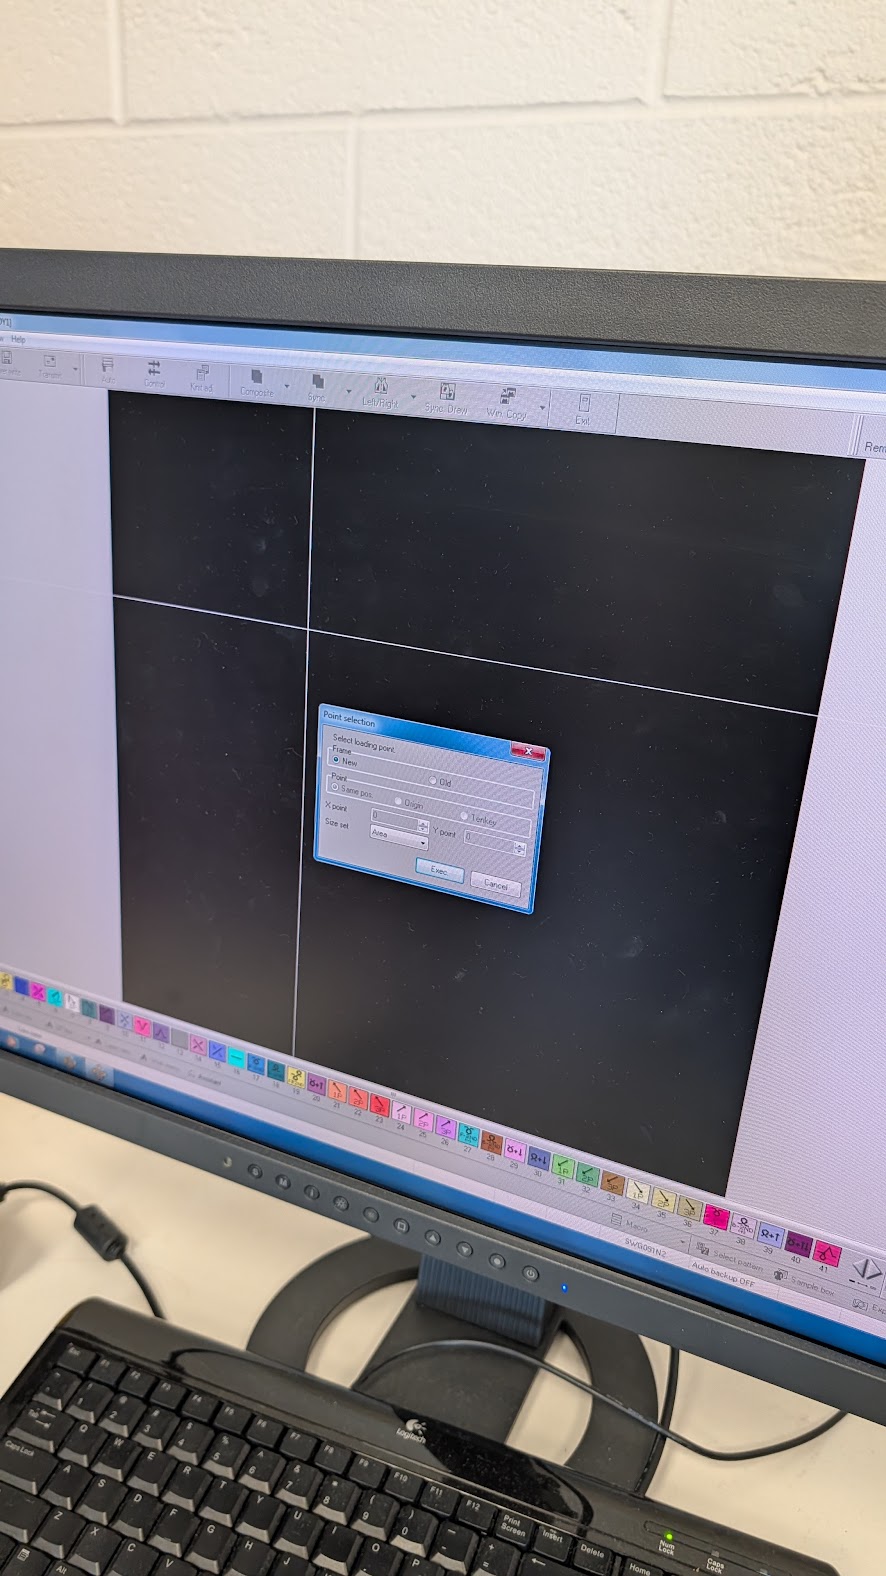
-
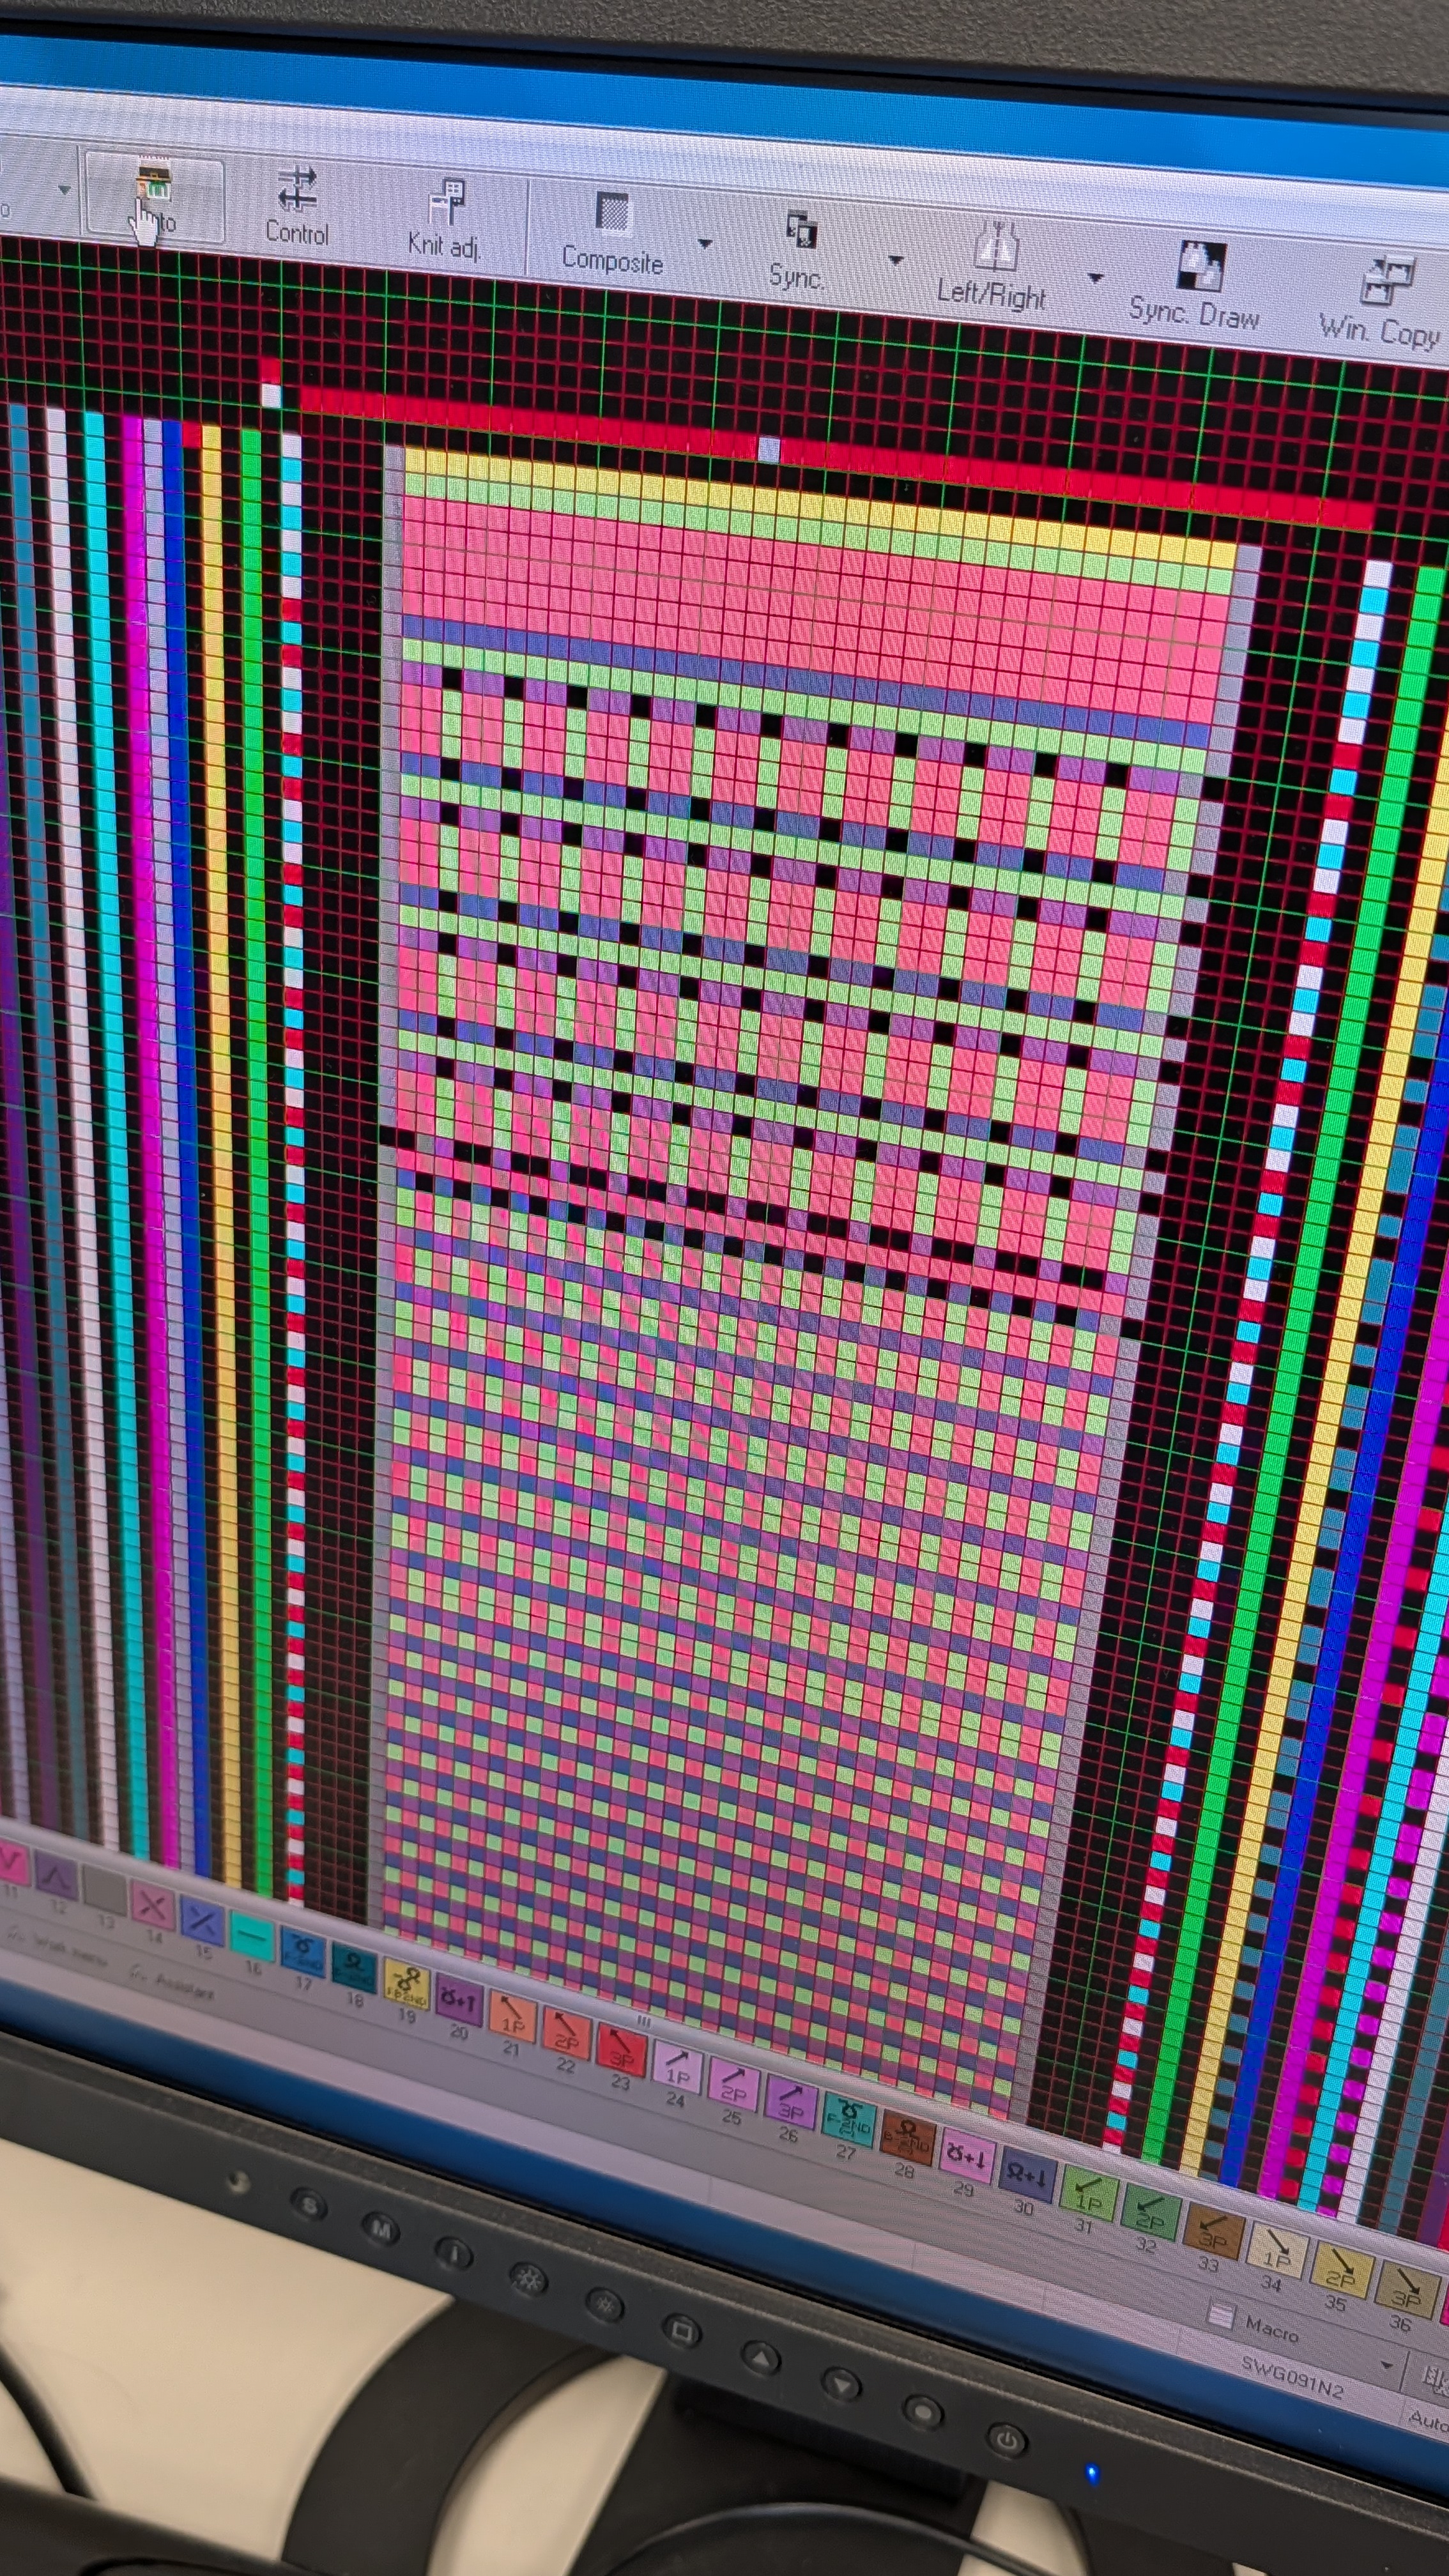
The pattern loads up in KnitPaint.
-
(Optionally) You can change where you want the leftmost stitch to be by choosing color 10 from the bottom (color) menu and put 10 onto the red bar at the top. The red bar represents the range of needles, and where you place the 10 pixel relatively corresponds to where the leftmost stitch will start on the needle bed.
-
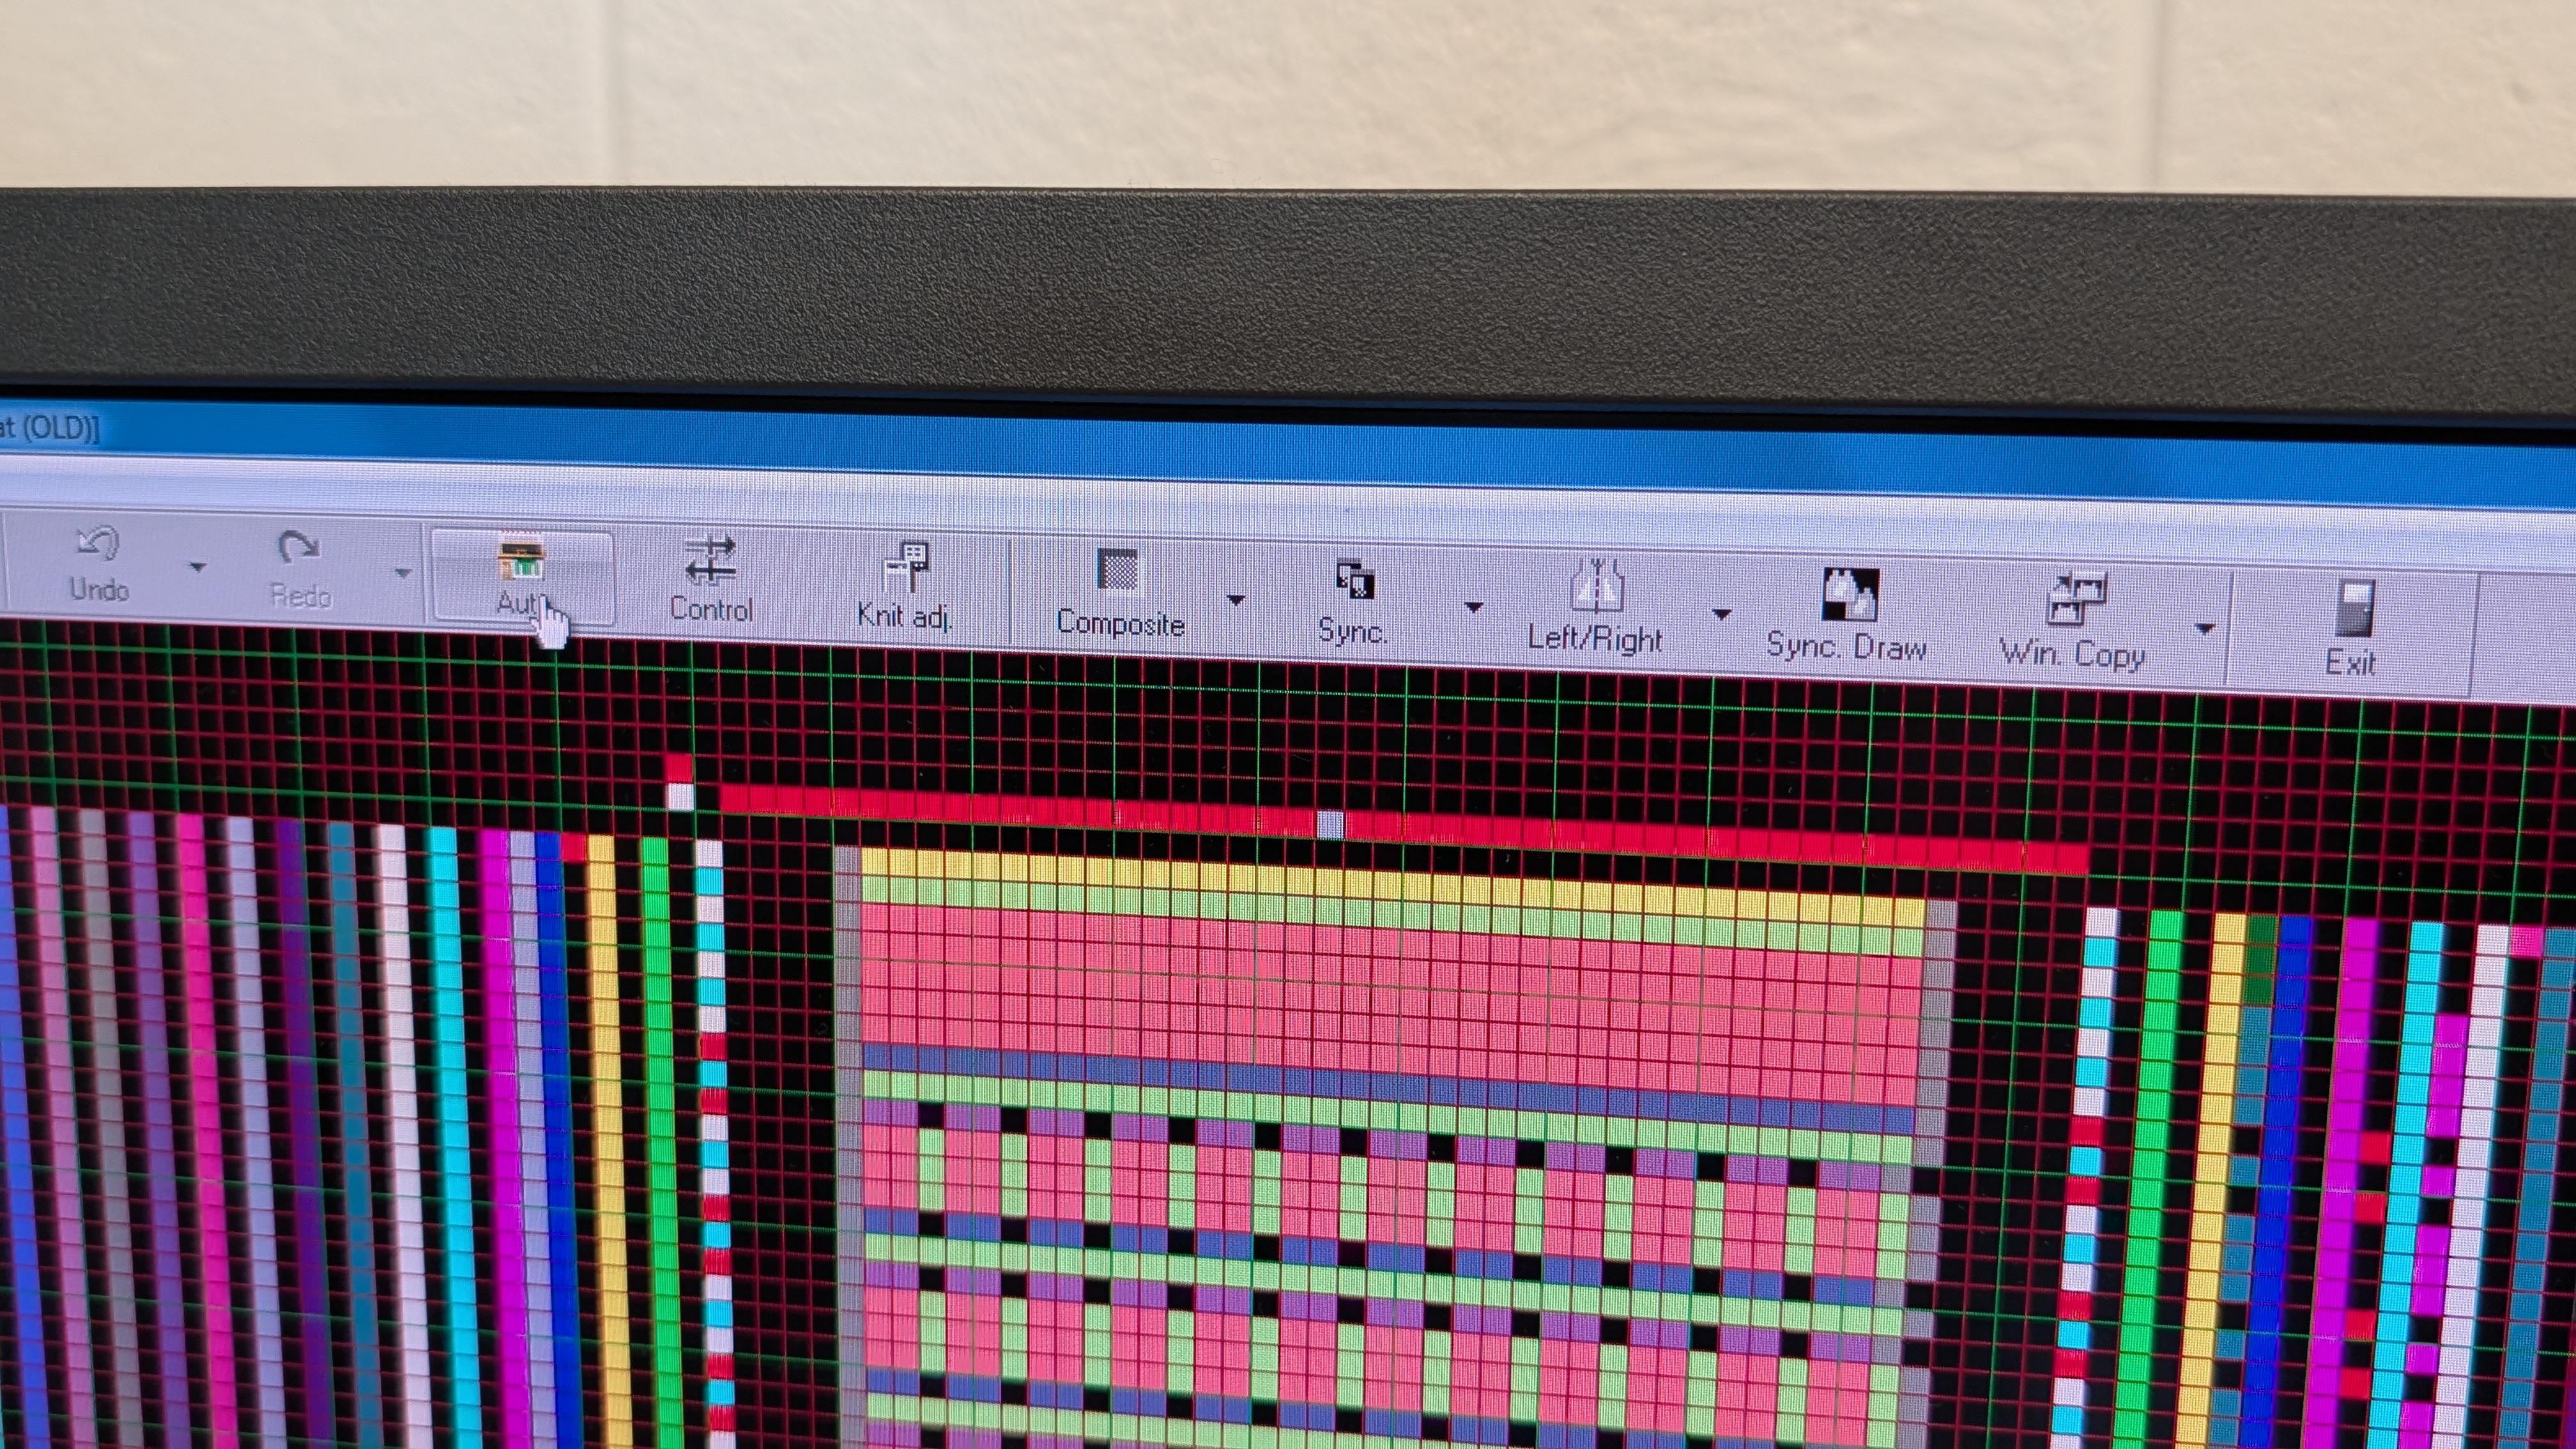
Click on “Auto” to start the auto process.
-
Click anywhere in the middle of the pattern.
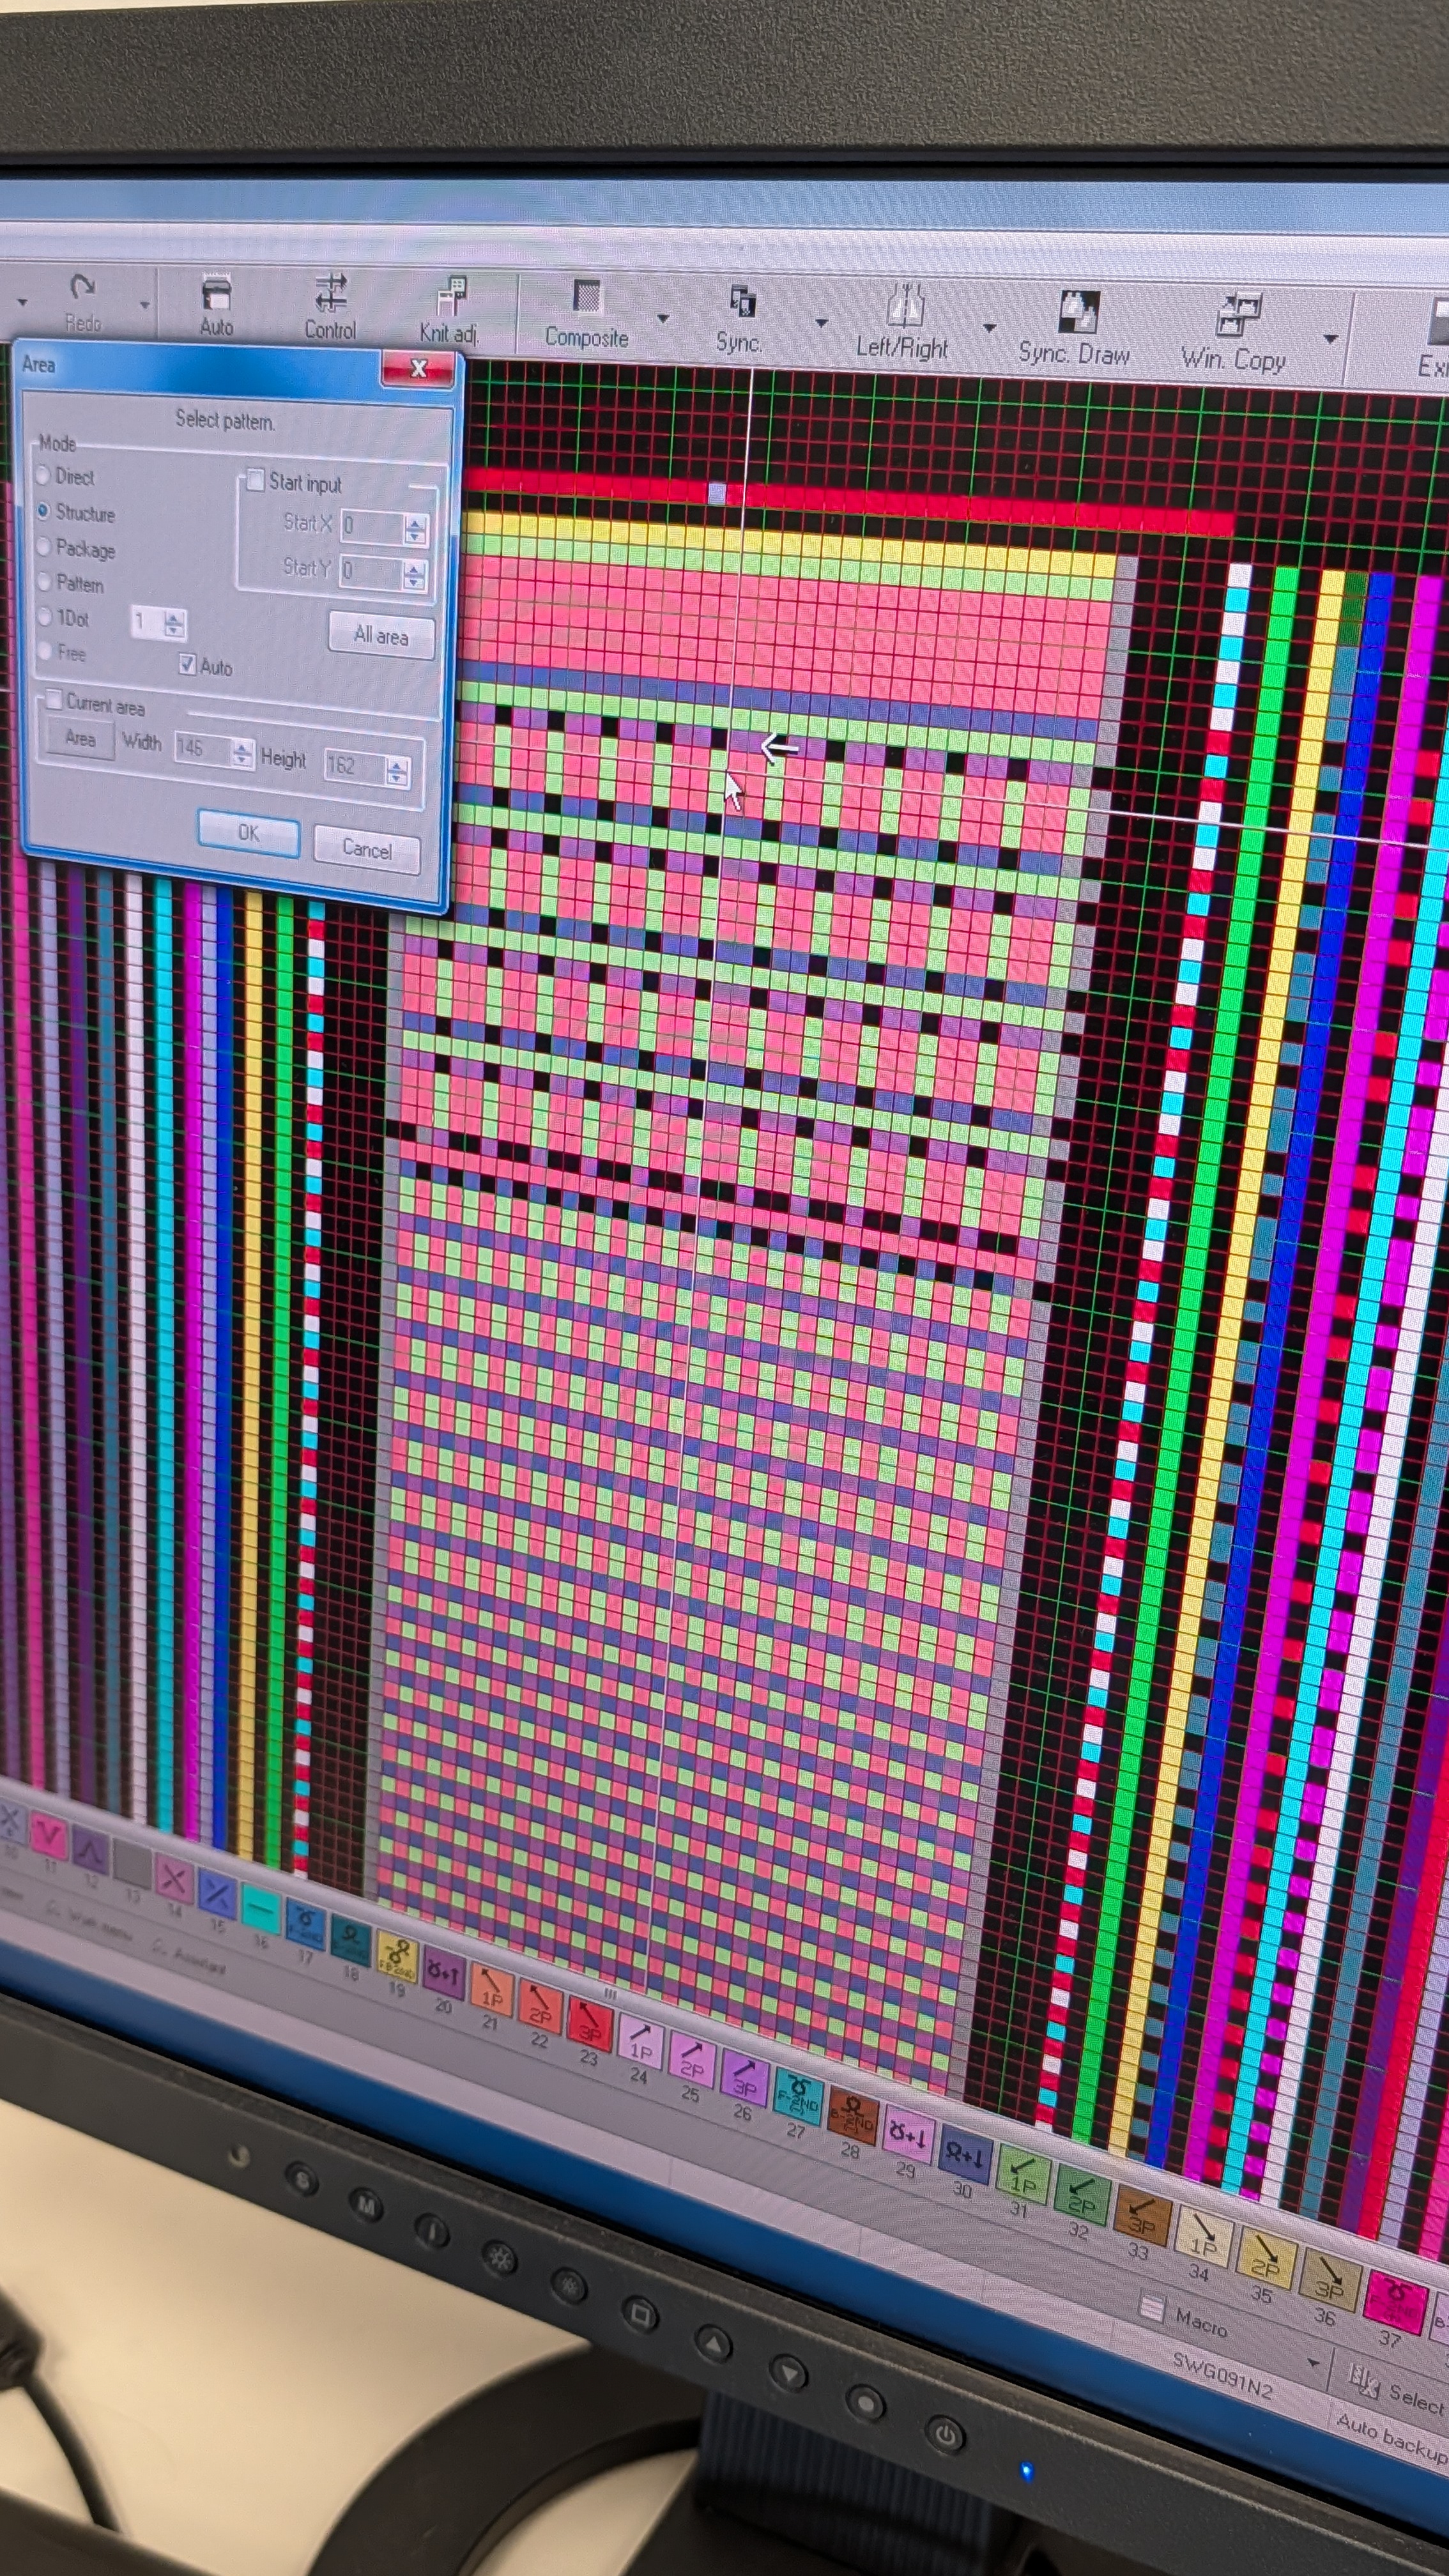
-
This is what you’ll see after the click. Click the “OK” in this dialog window.
-
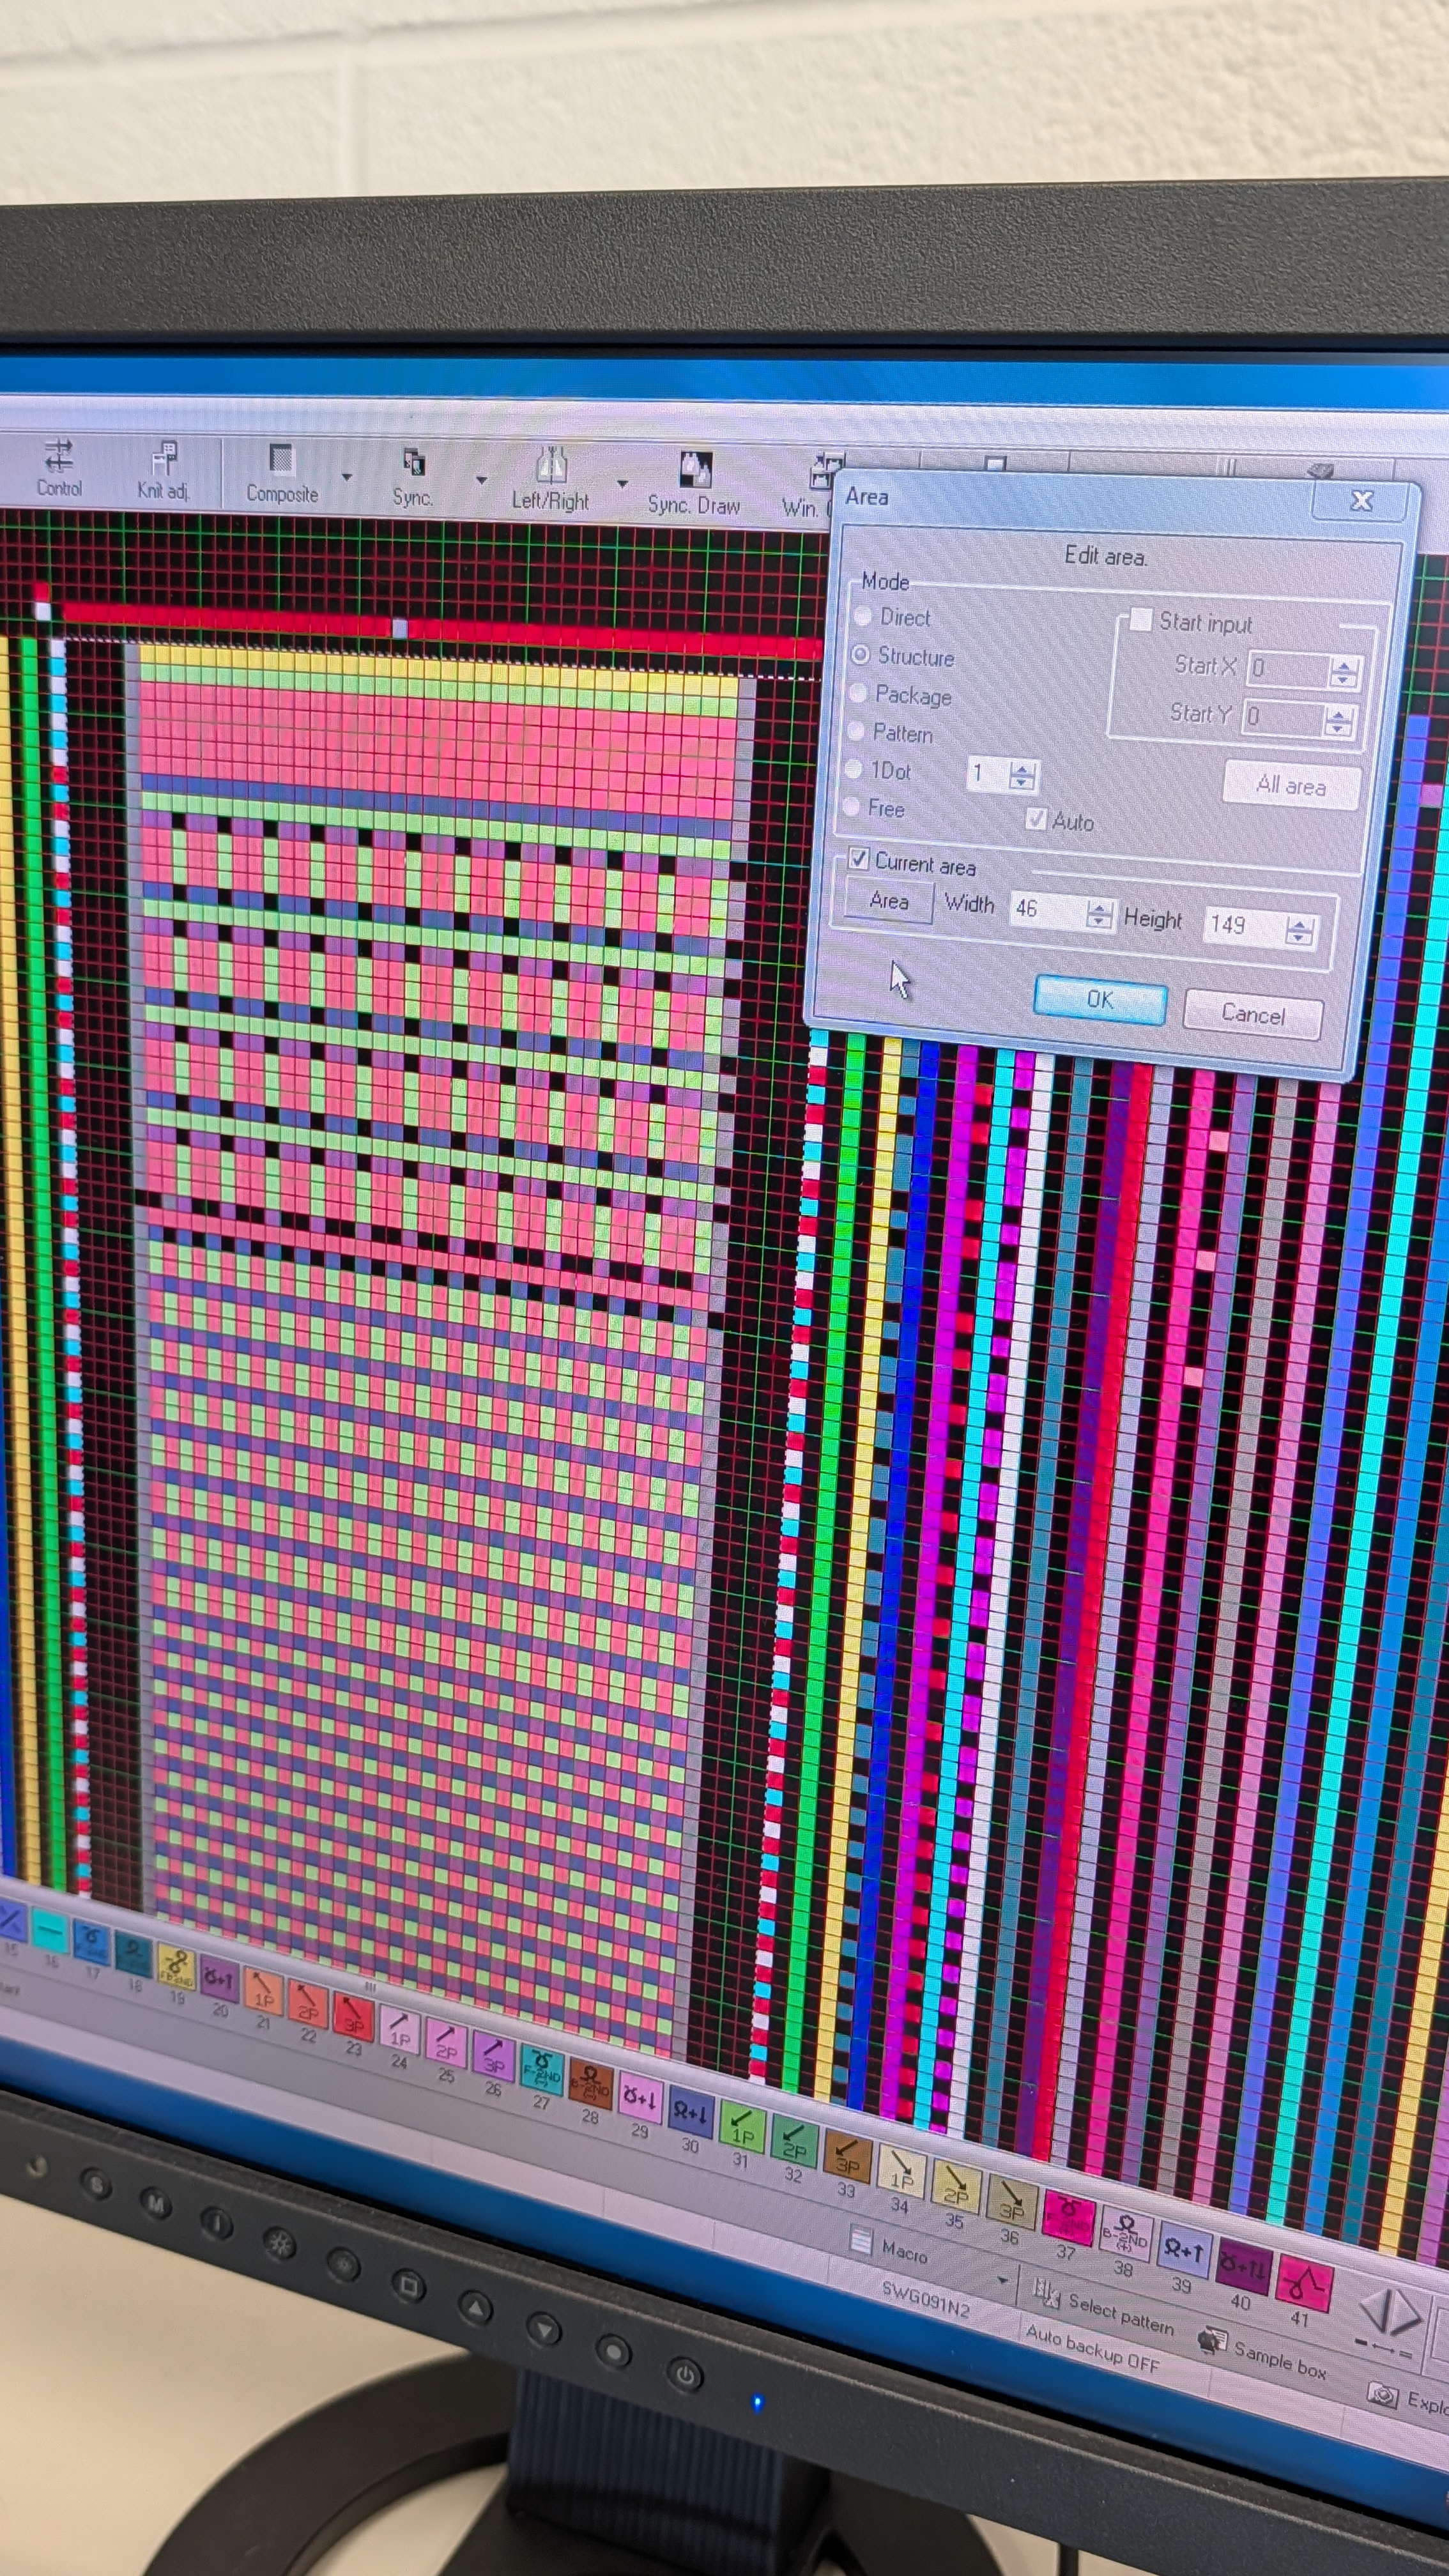
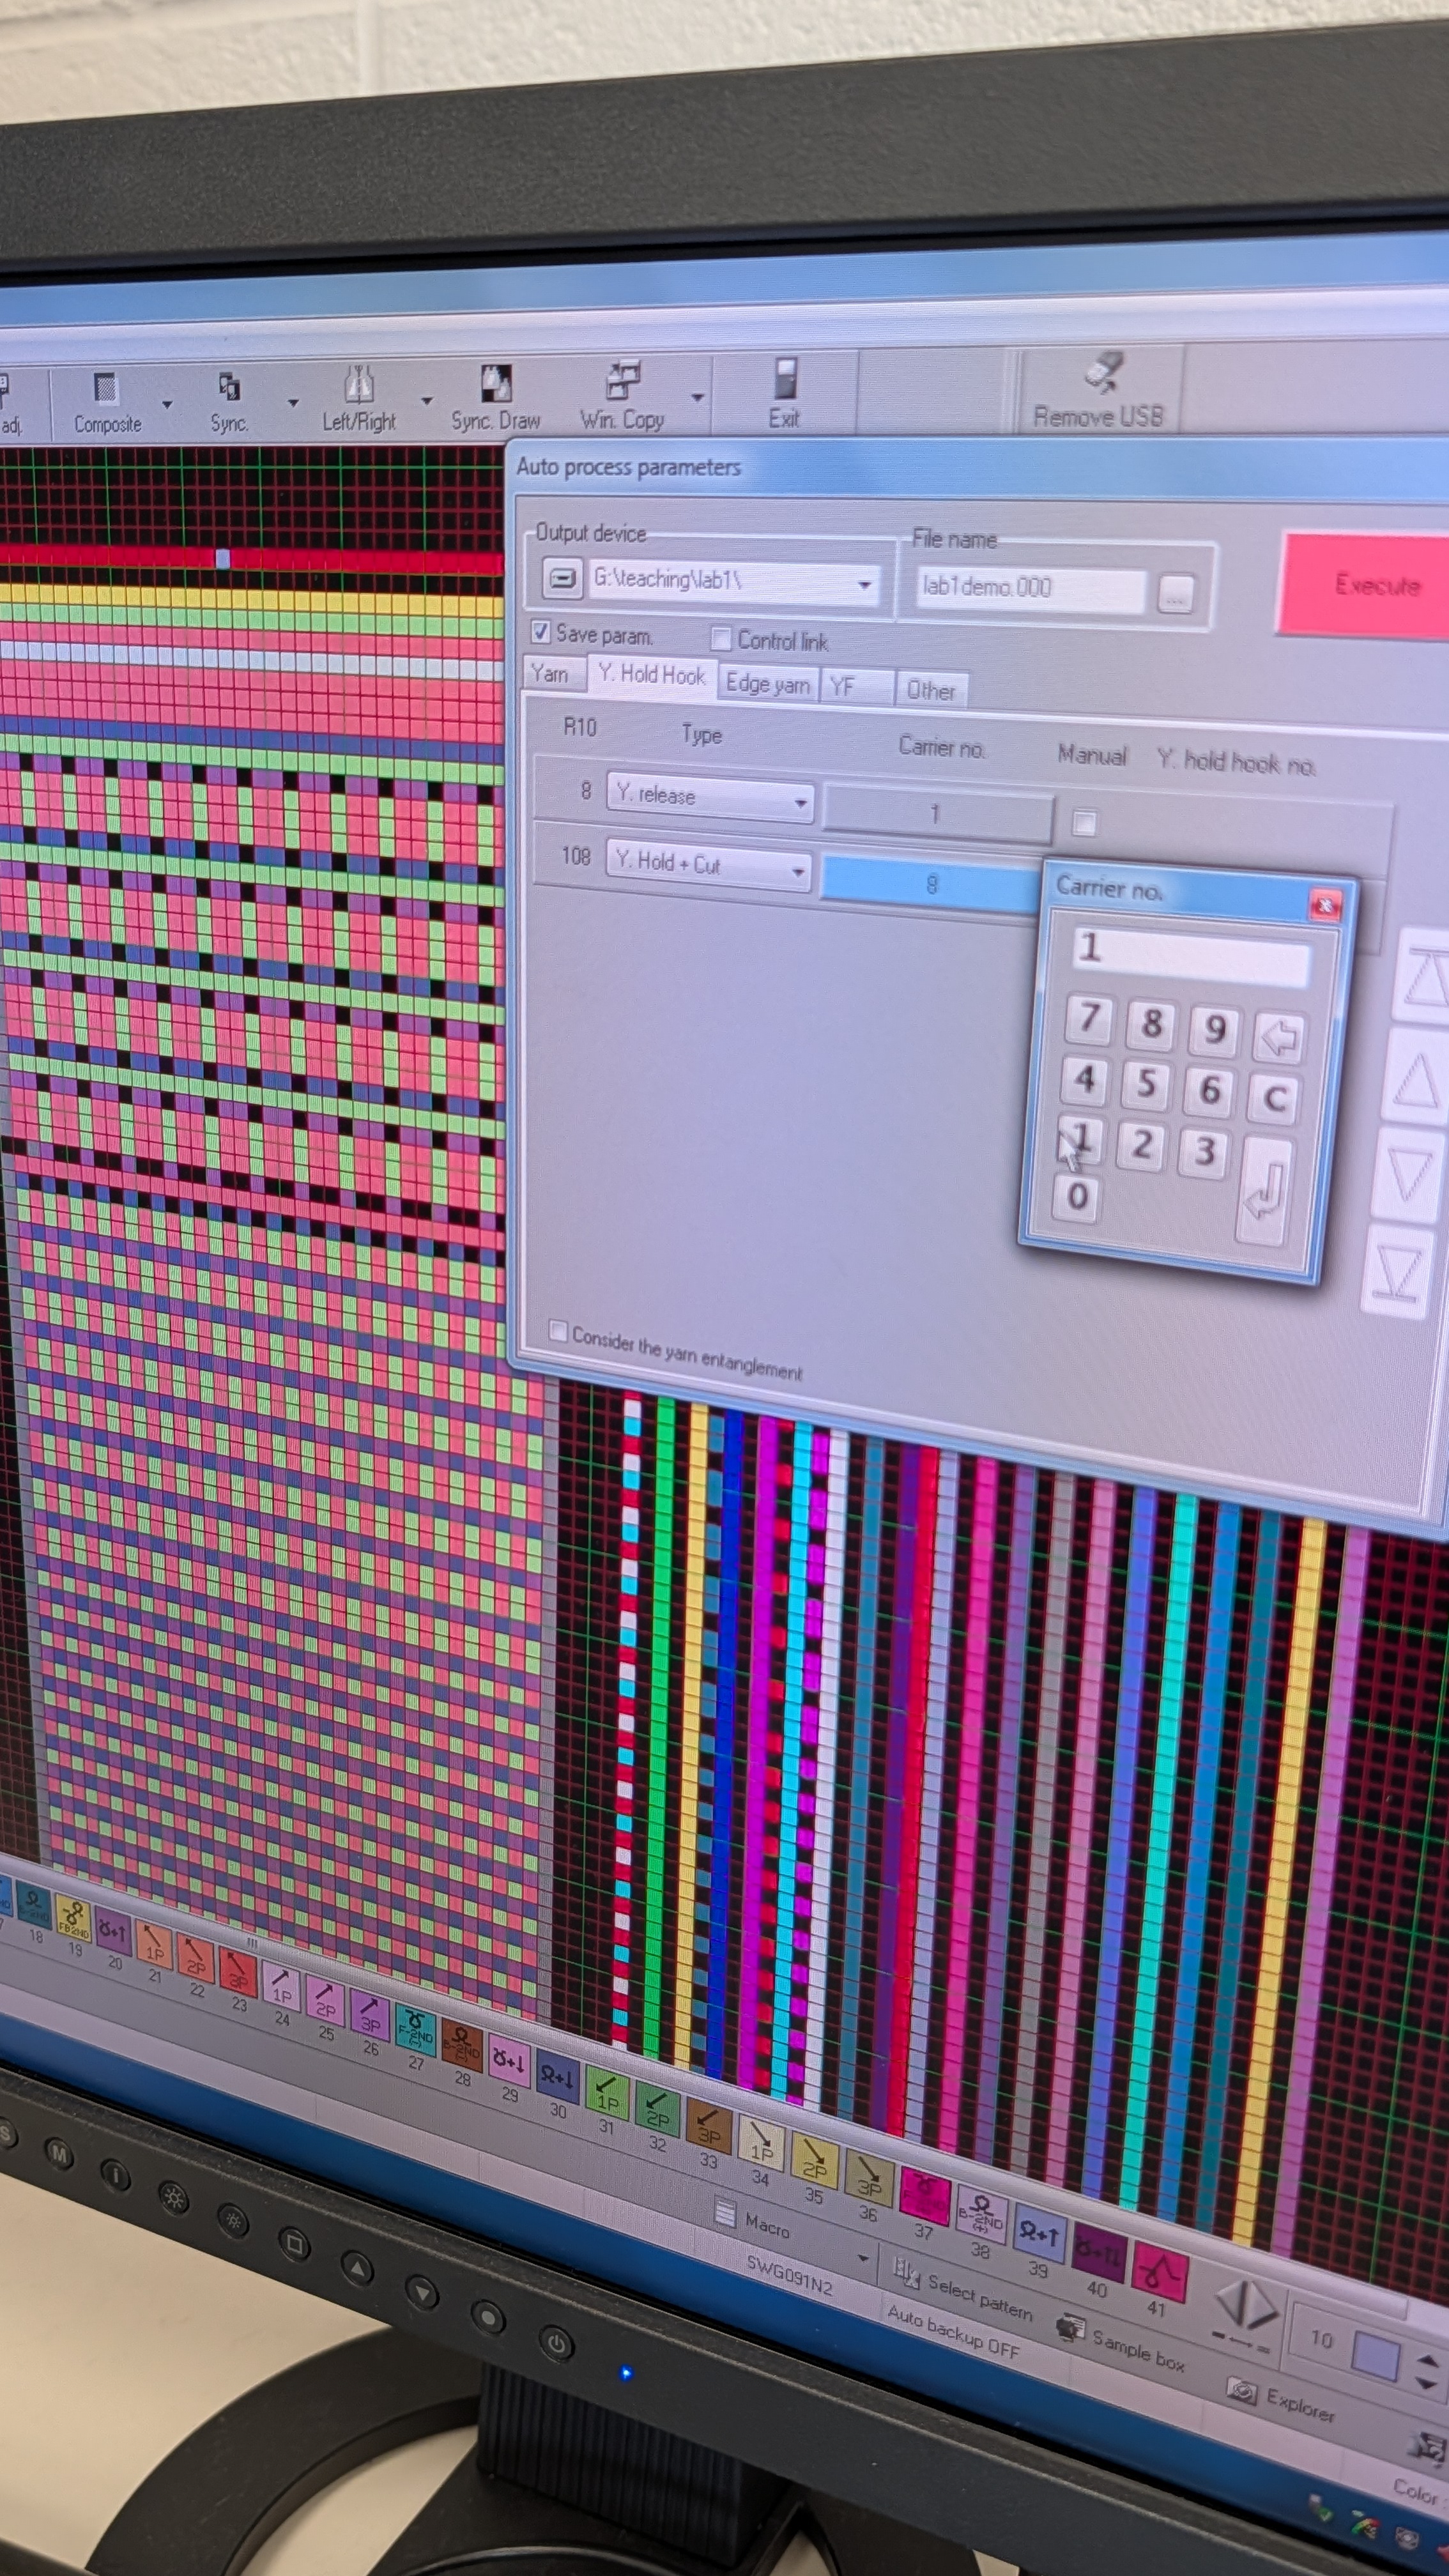
Now we modify the yarn carriers if needed. The pattern file will have already specified yarn carriers. If the actual yarns you want to use are not corresponding to the carriers you specified in your pattern, you can modify them here.
First, change the carrier.
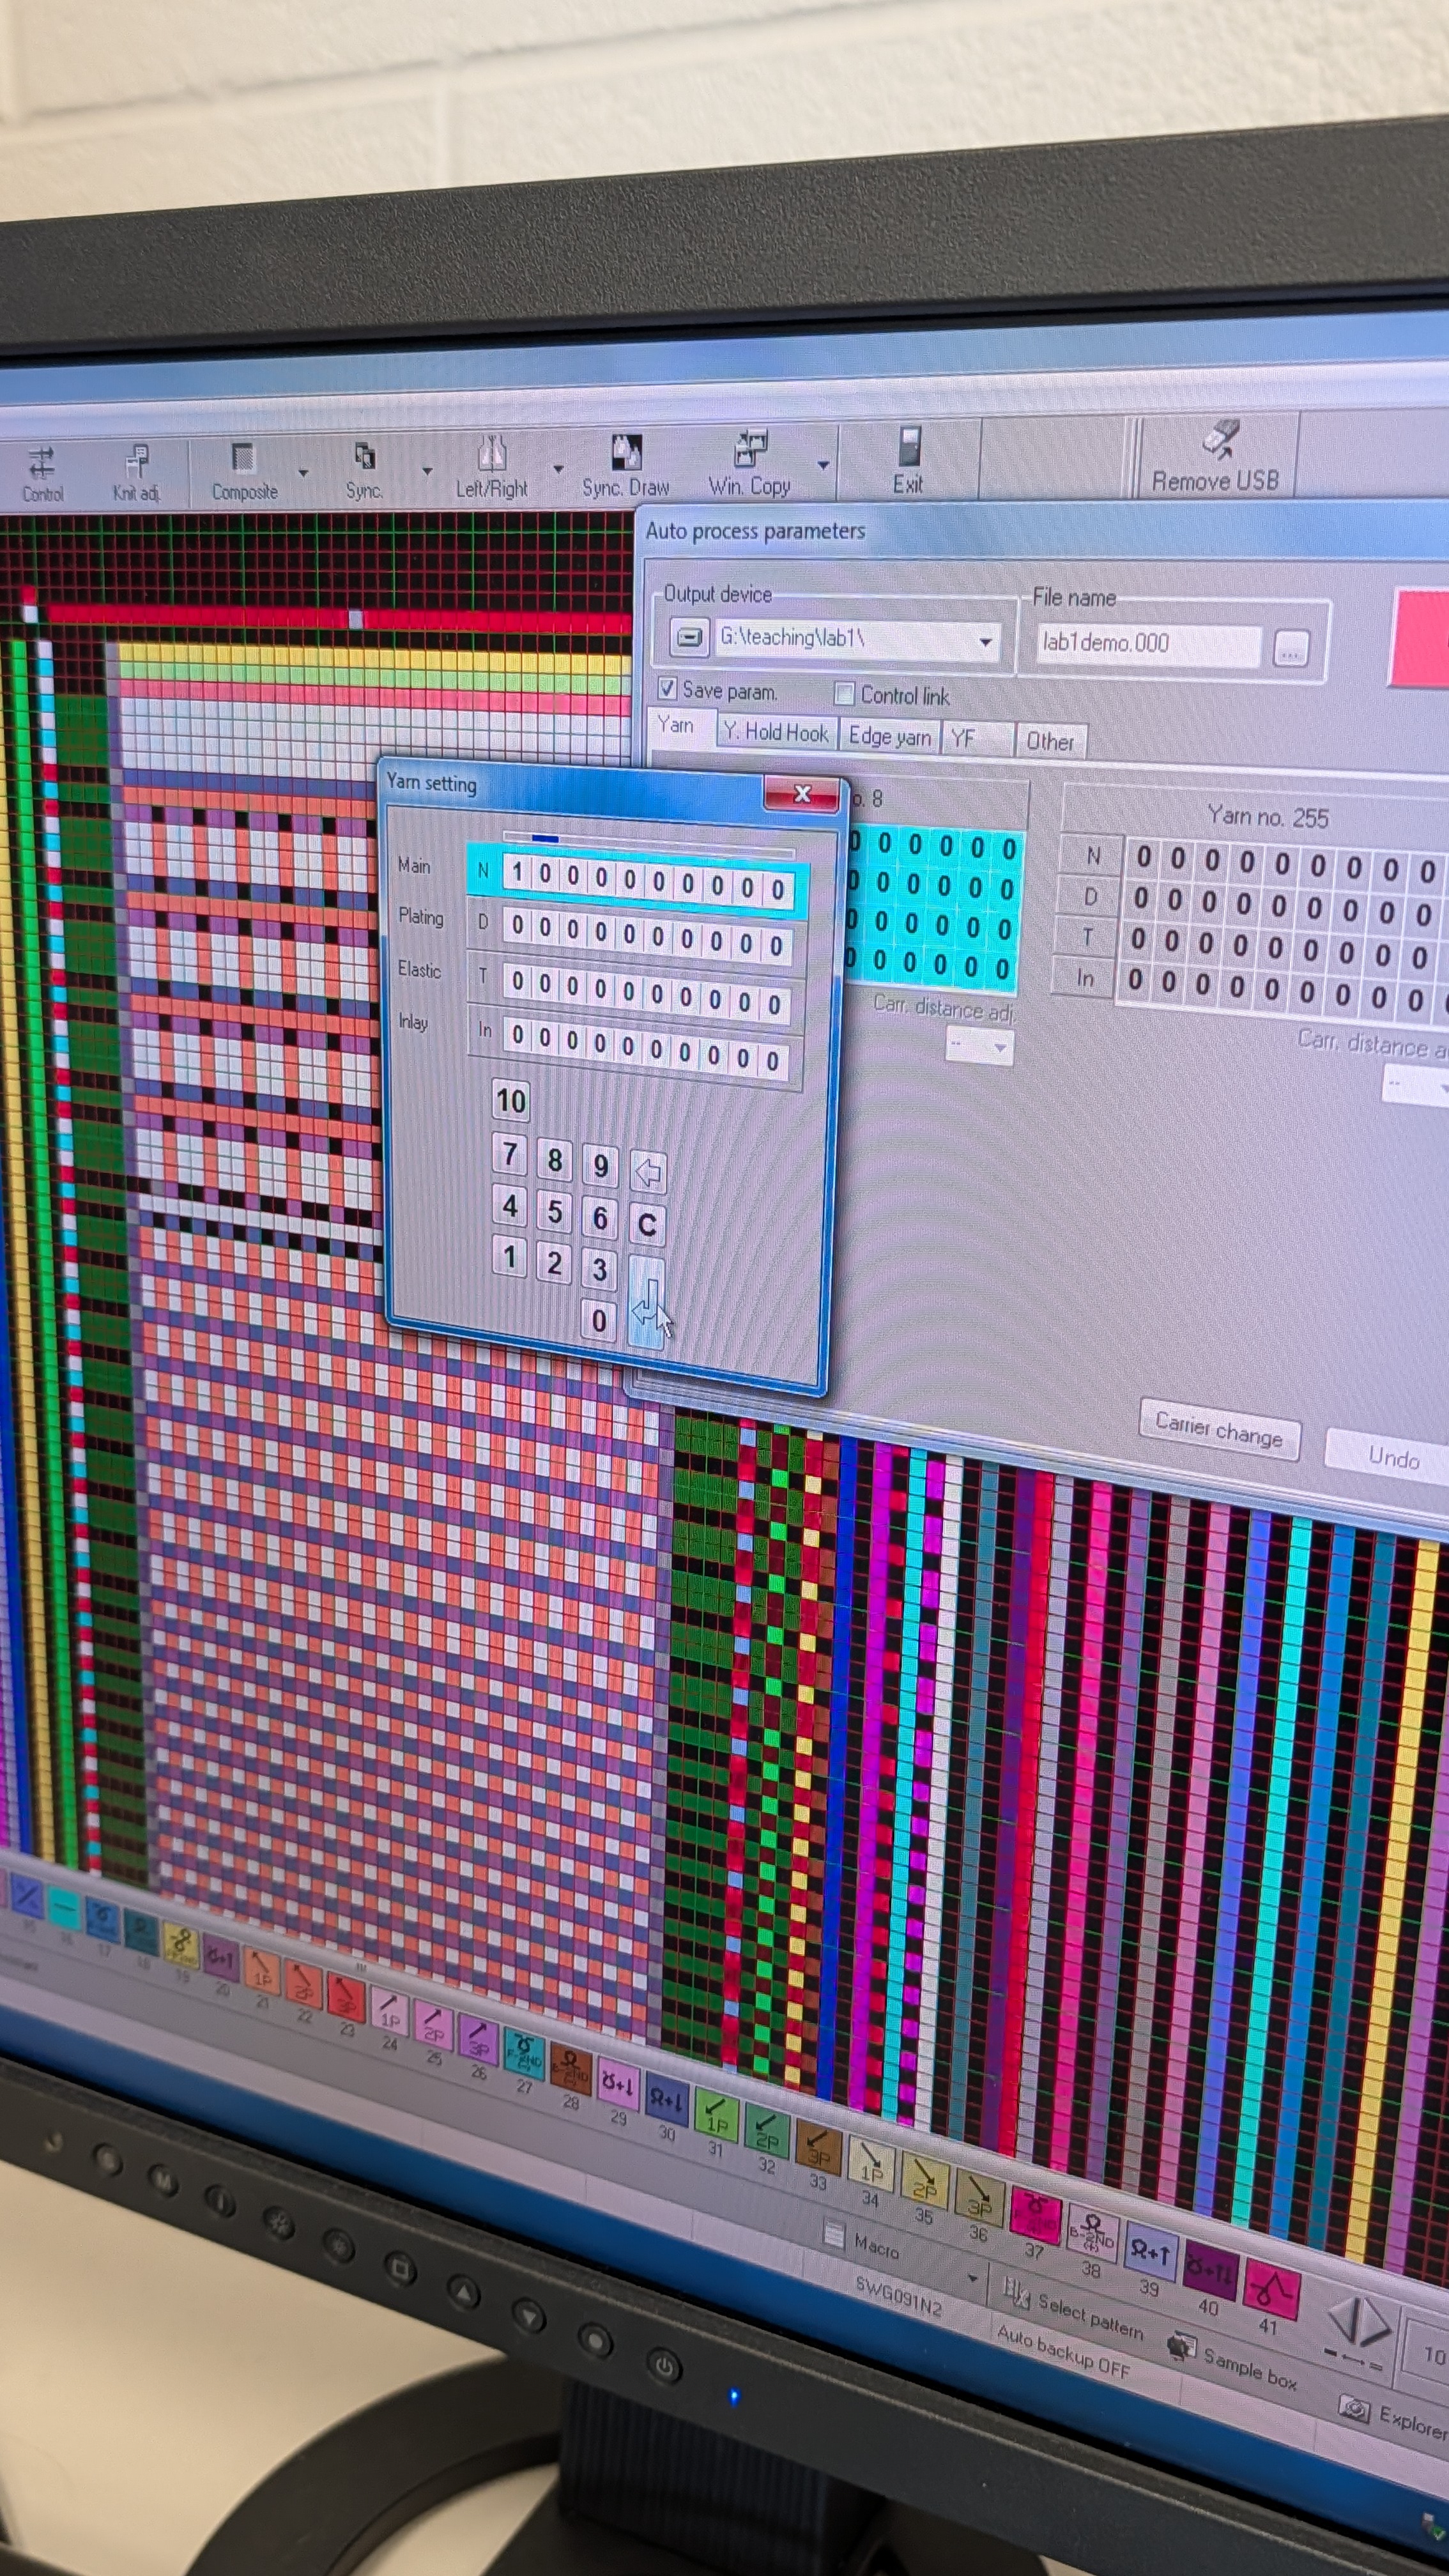
Next, change the corresponding pair of yarn holding hooks.
-
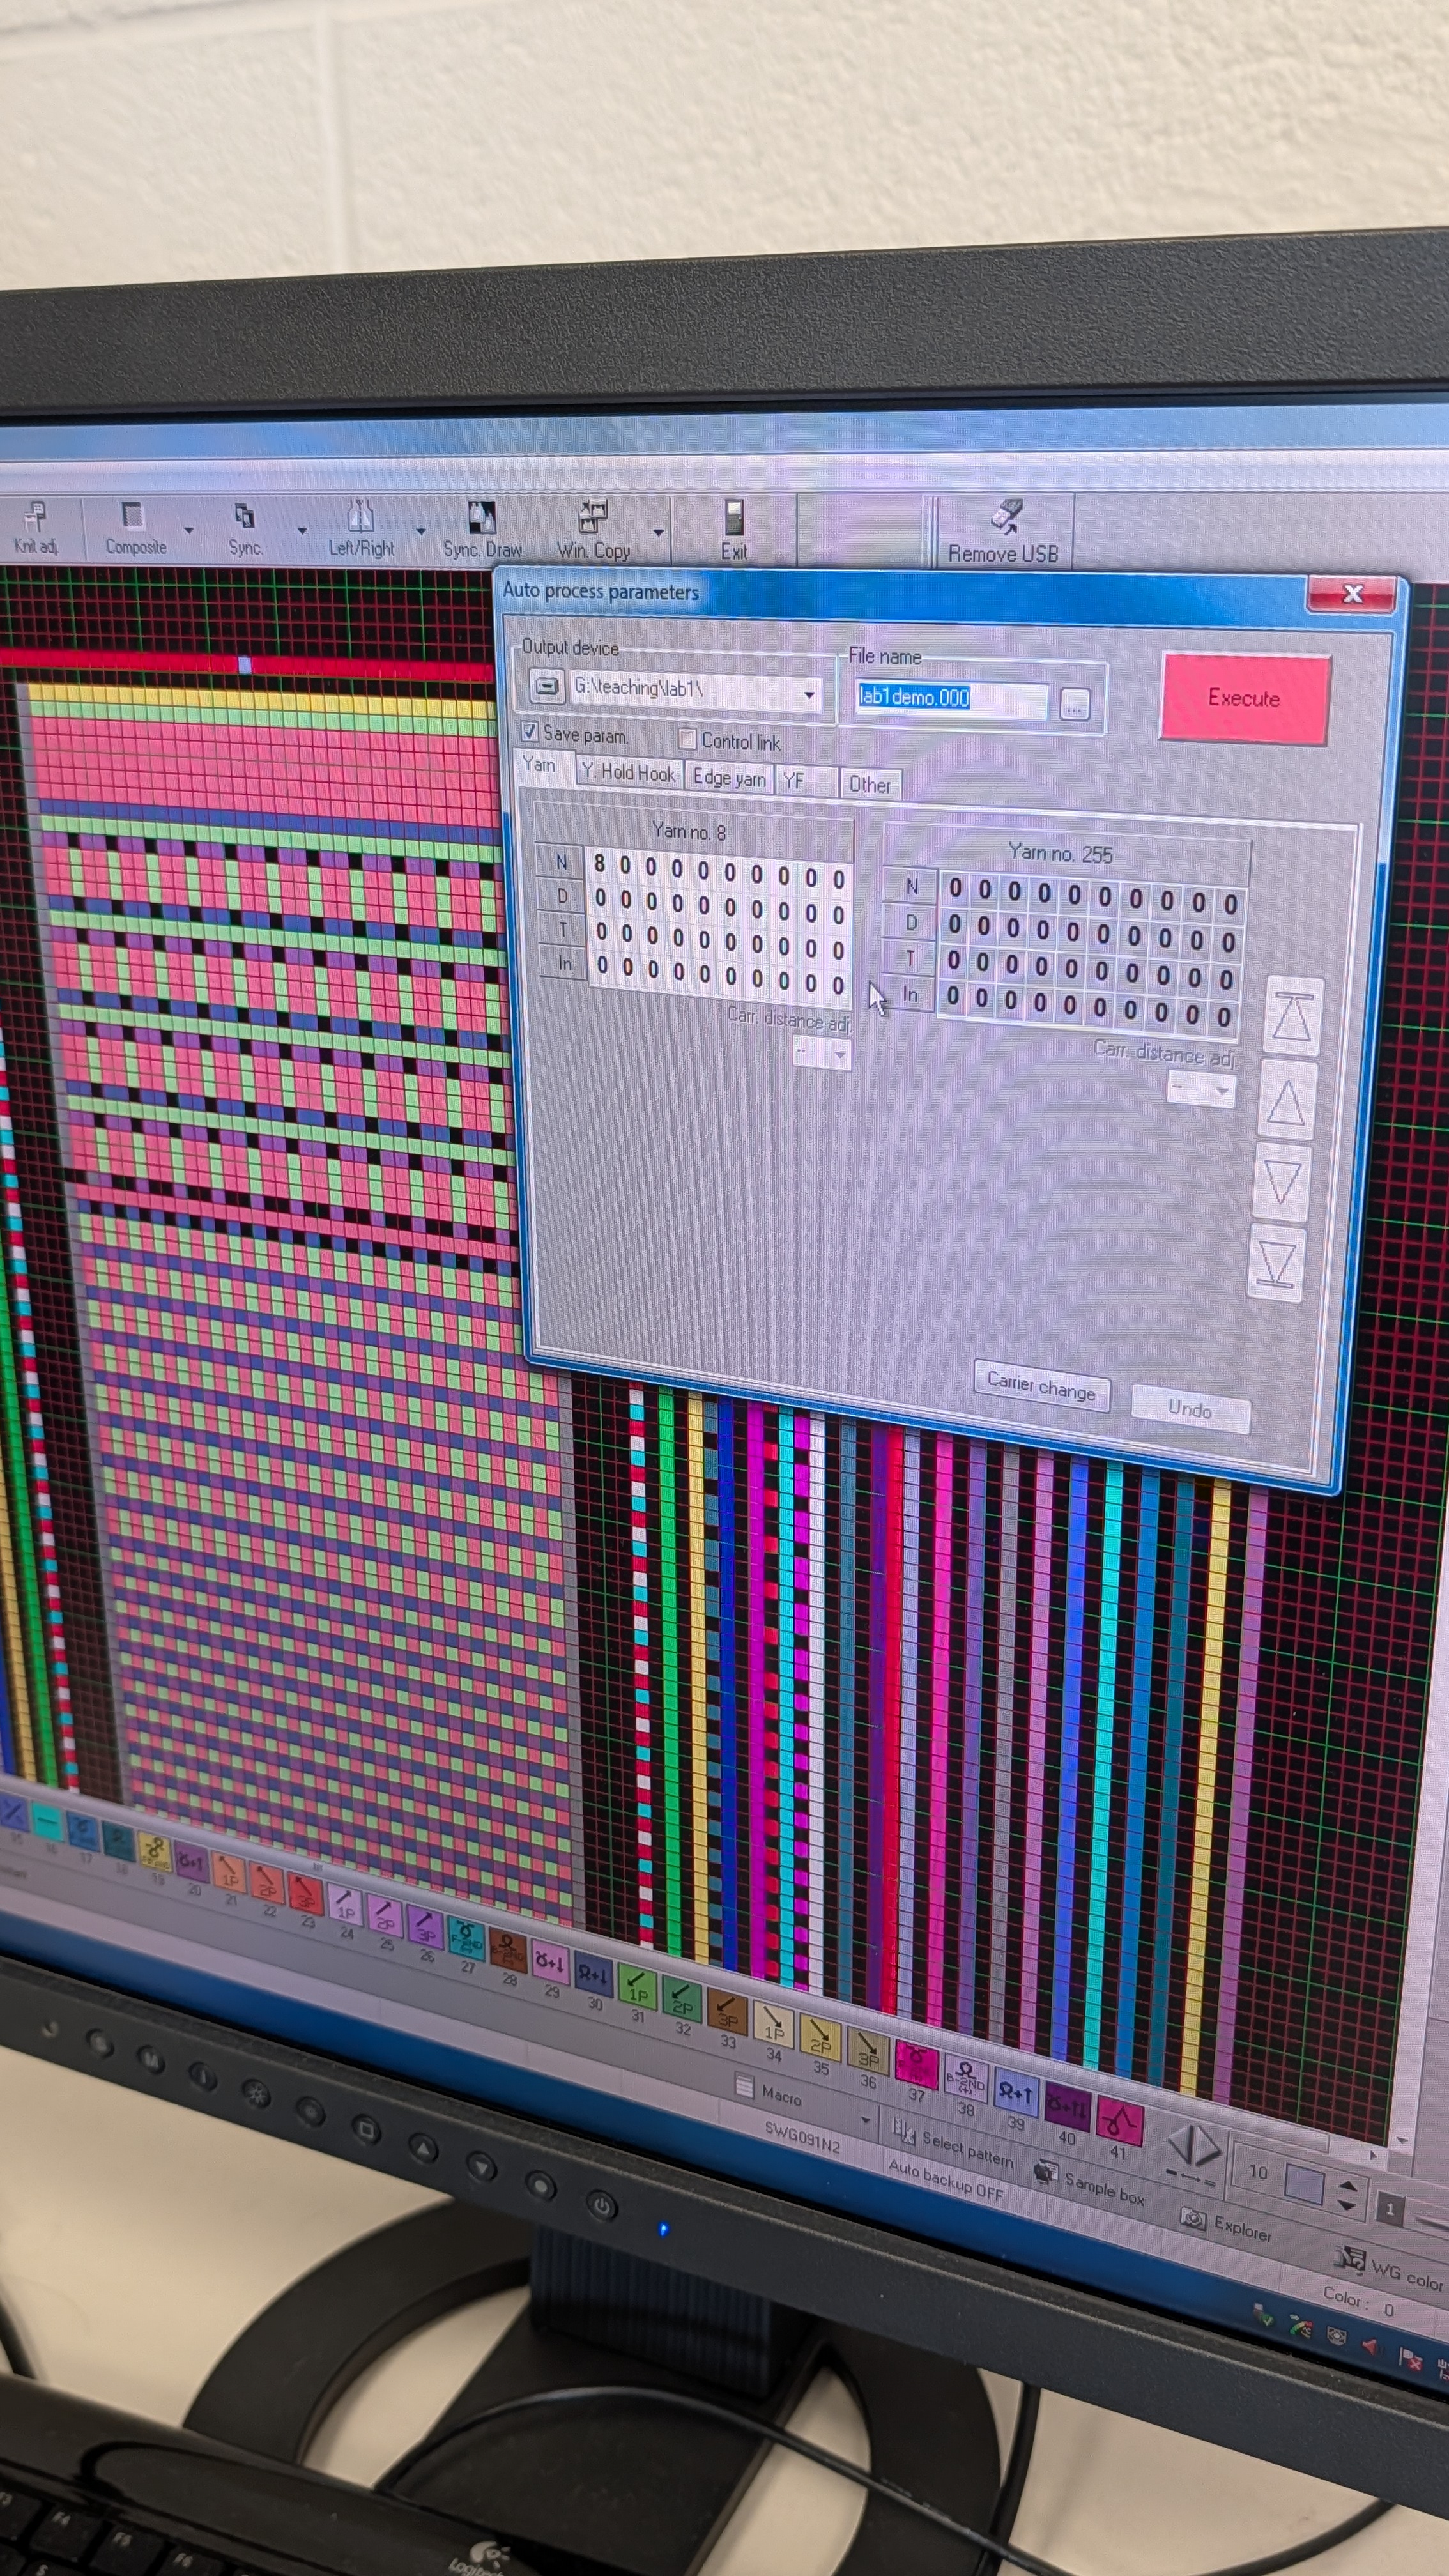
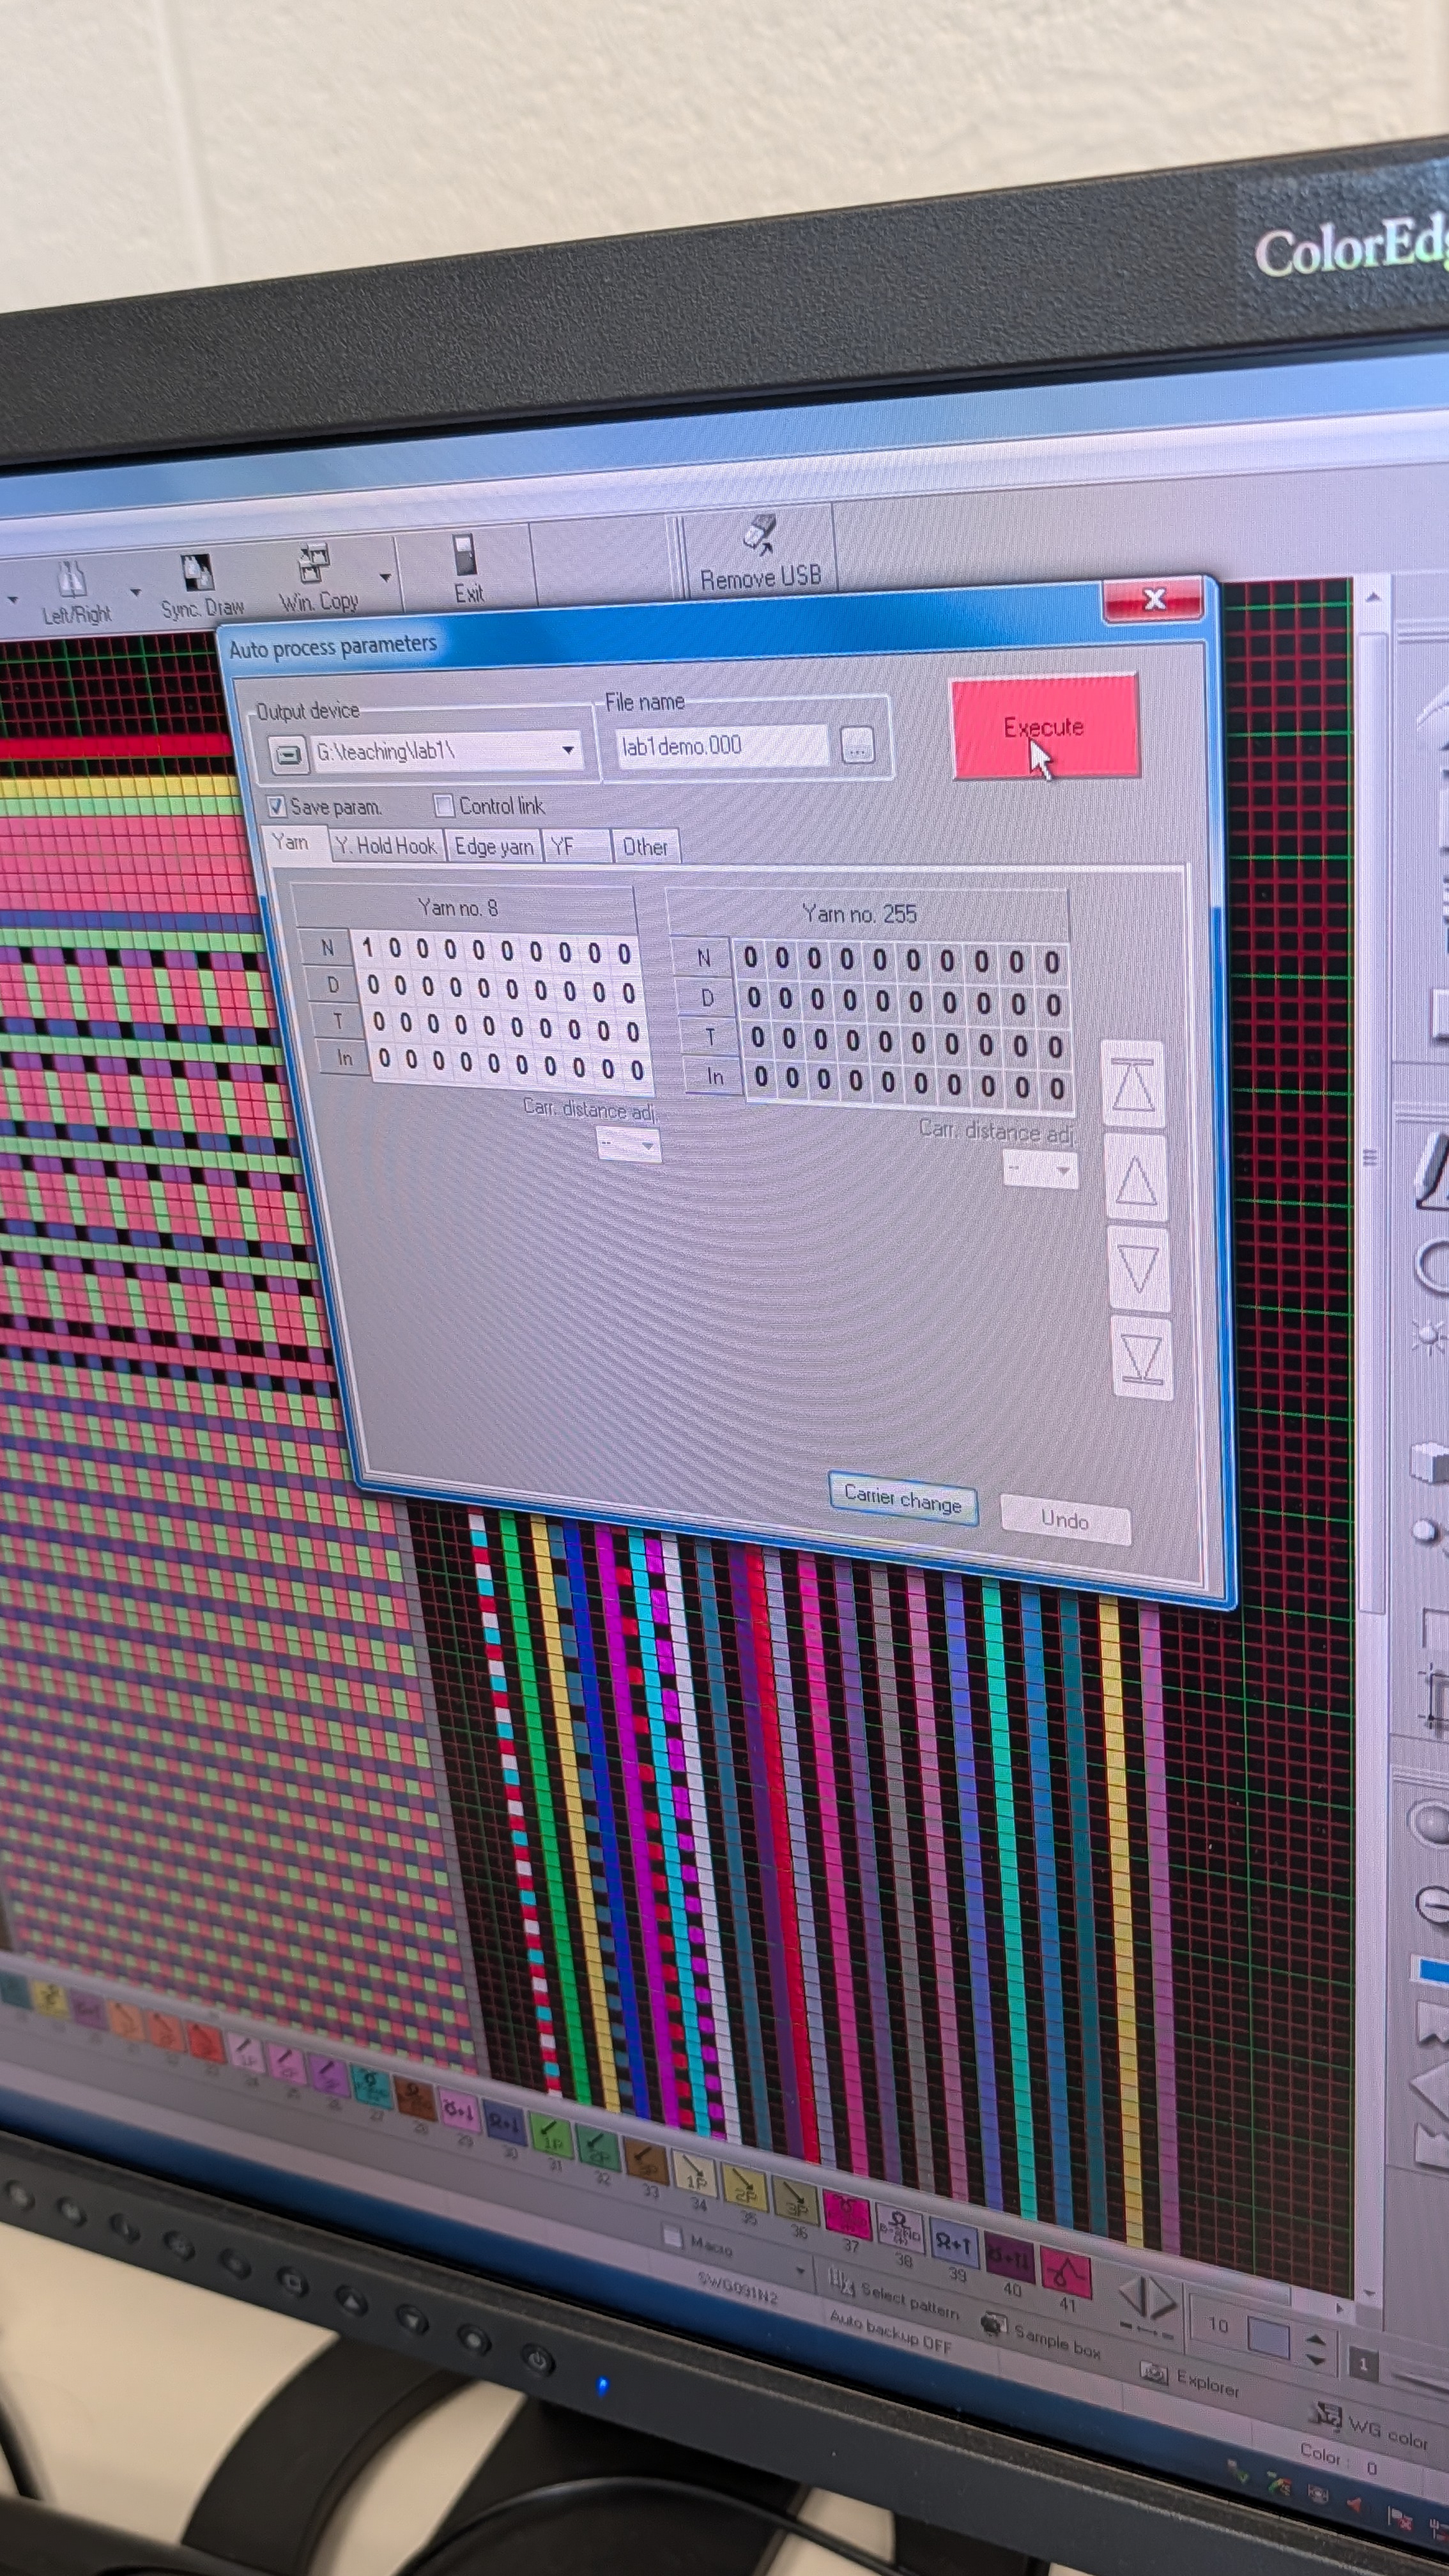
After the yarn modifications, click “Execute” to go to the next step.
-
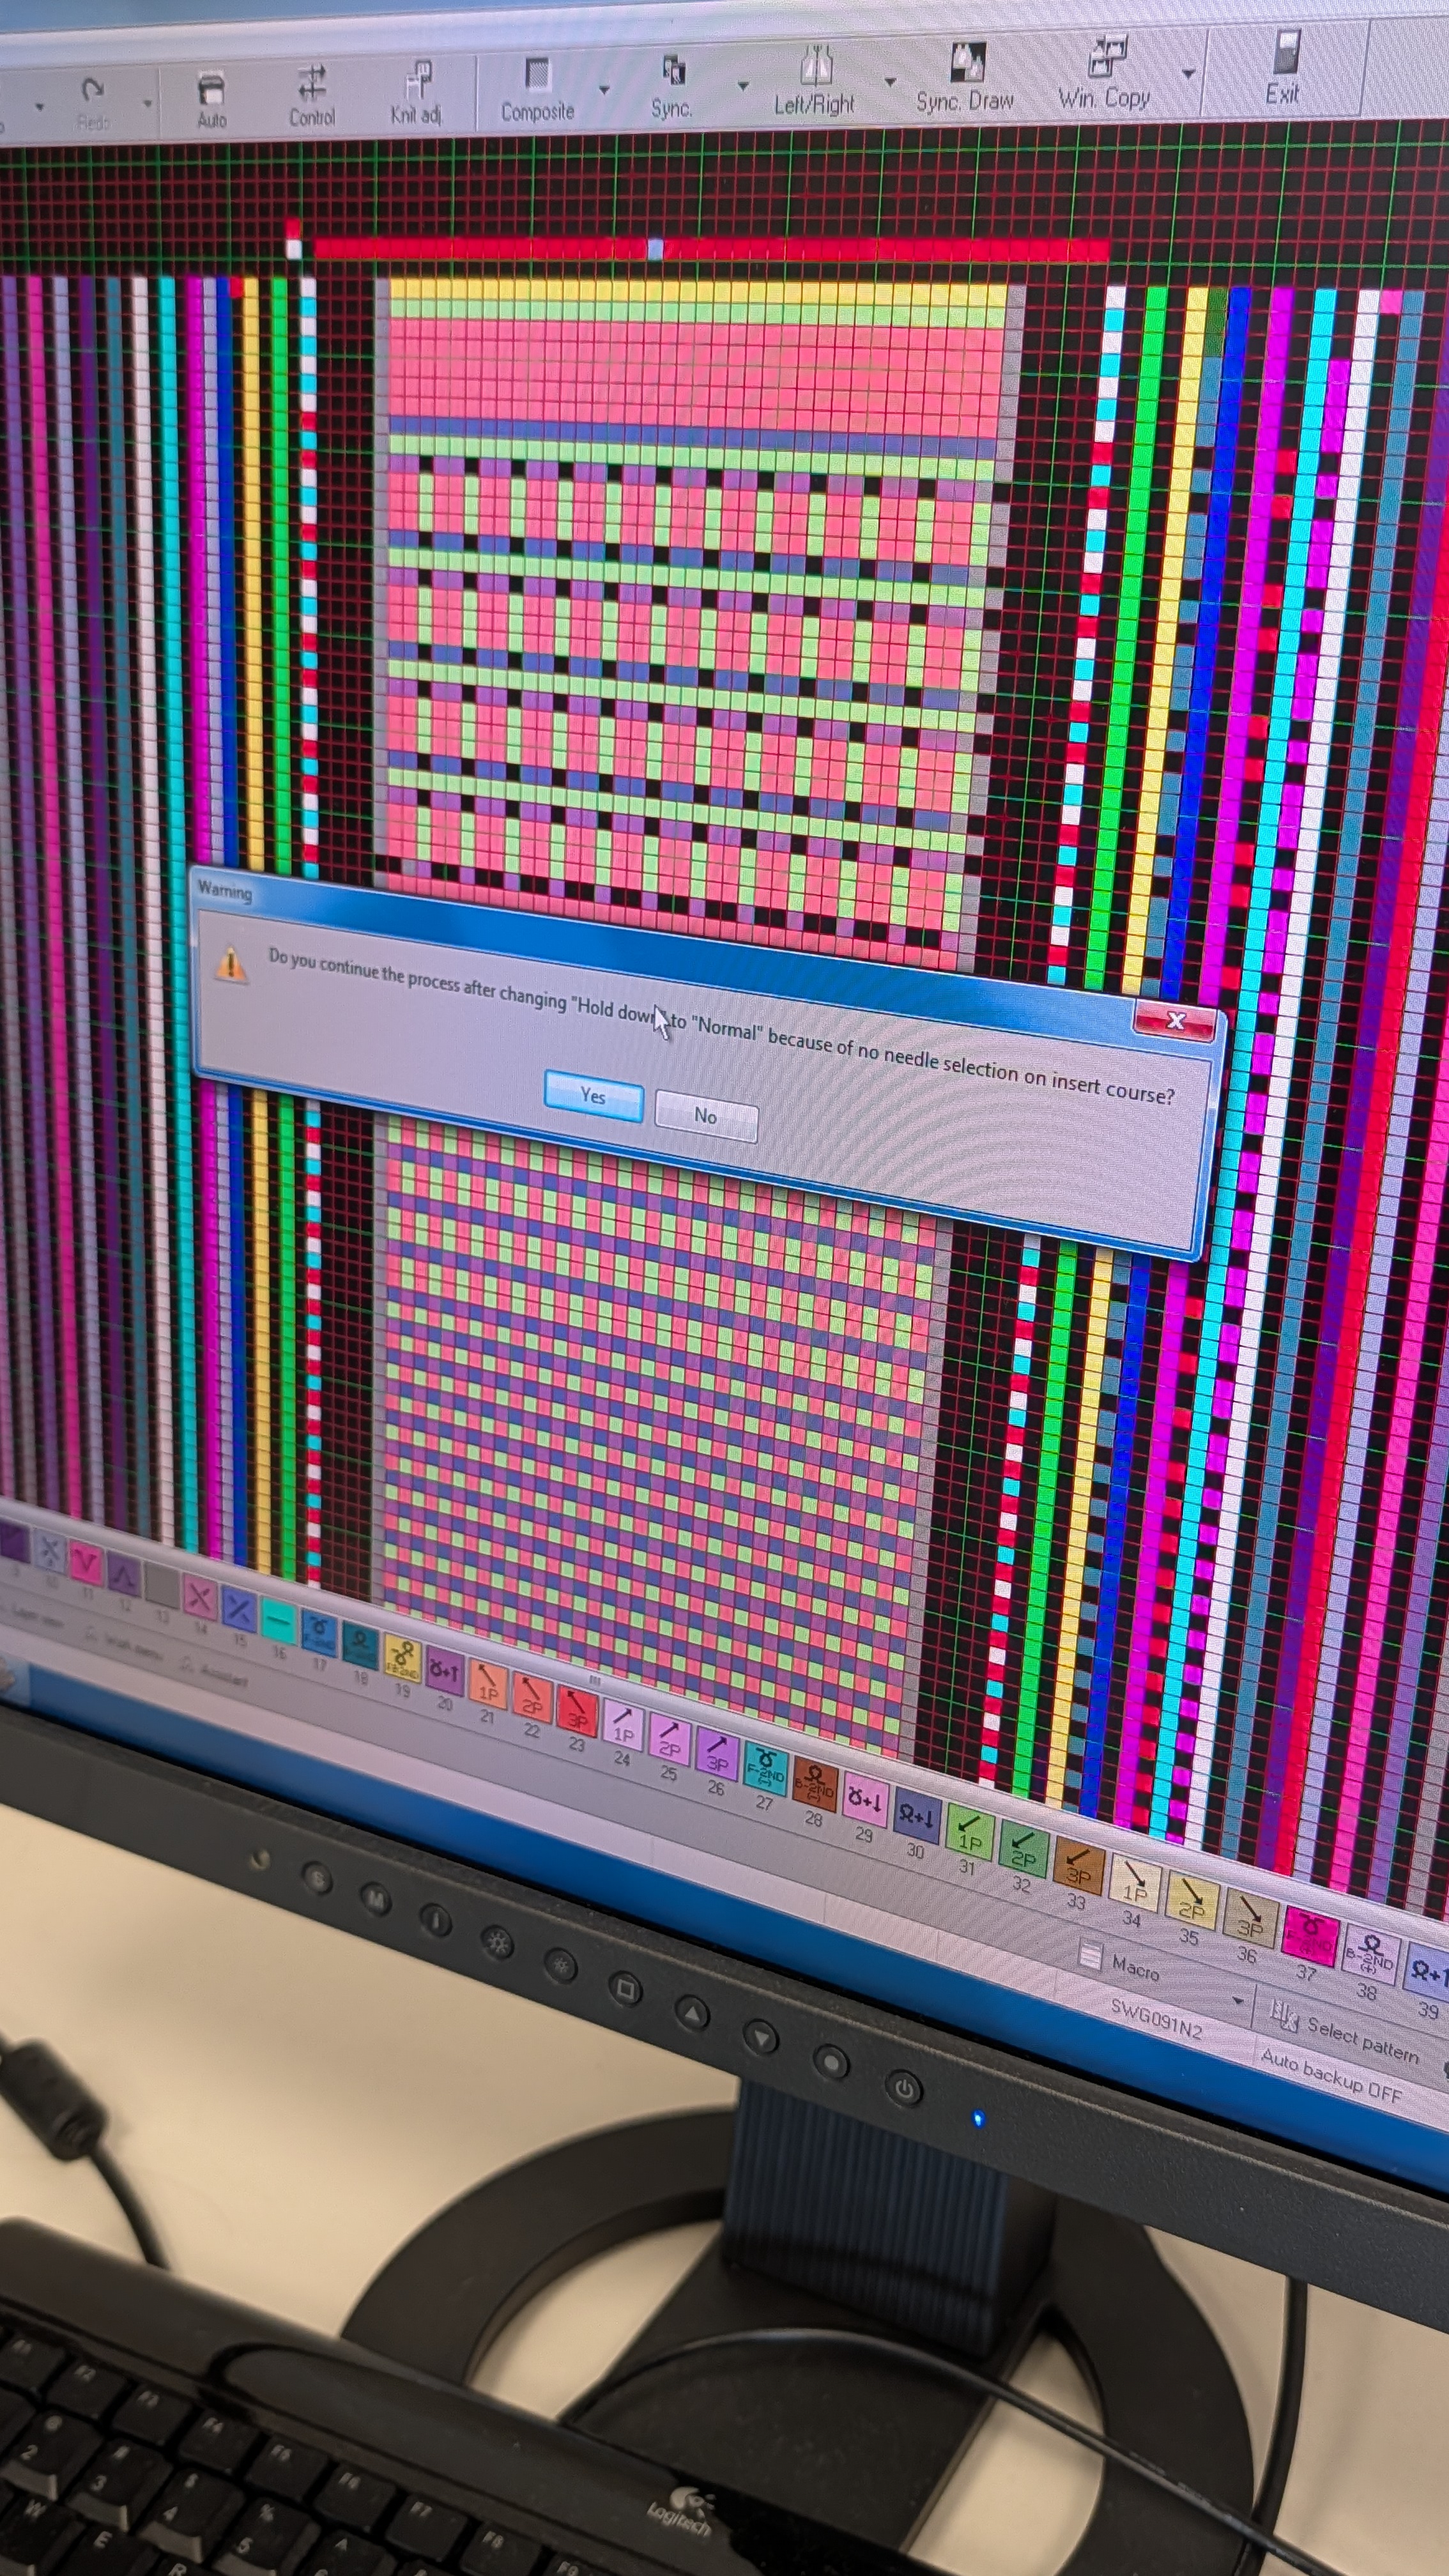
It might ask you to confirm something. Just click through “Yes”. The hold down mode of edge yarn usually doesn’t cause much of a difference and we can keep the default.
-
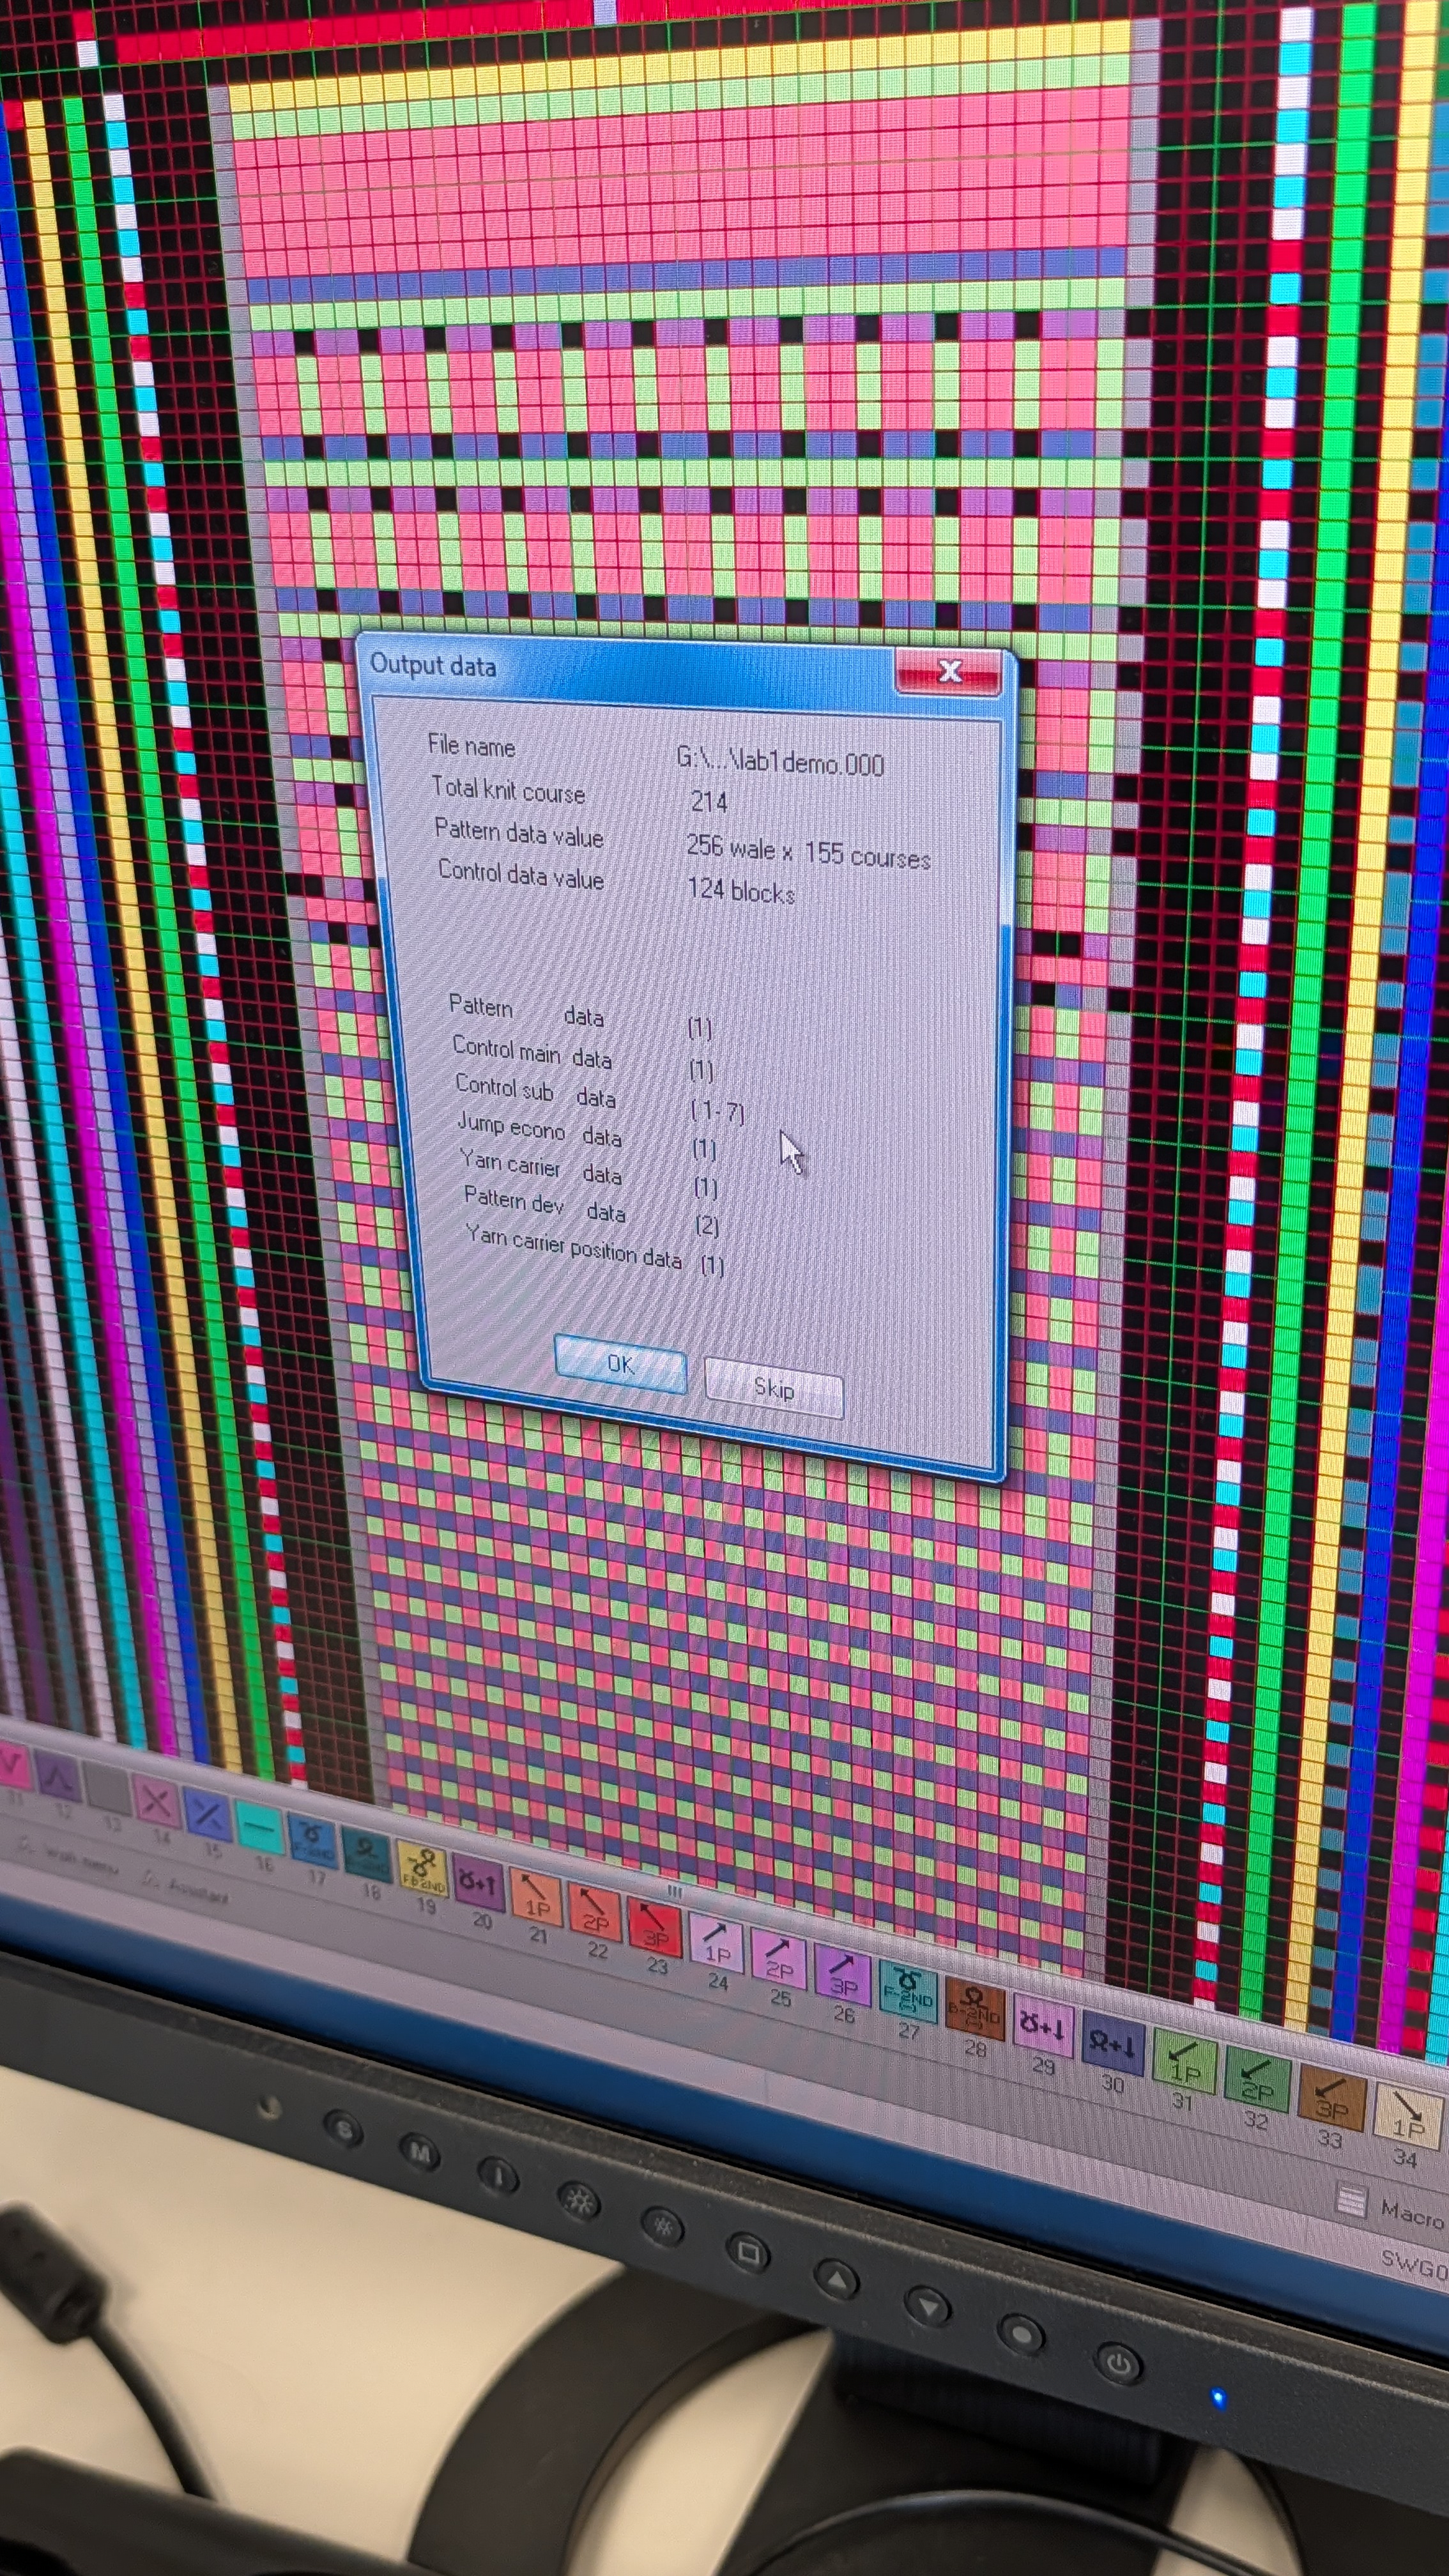
Now it shows you some basic stats about your pattern. Just click “OK” here to continue.
-
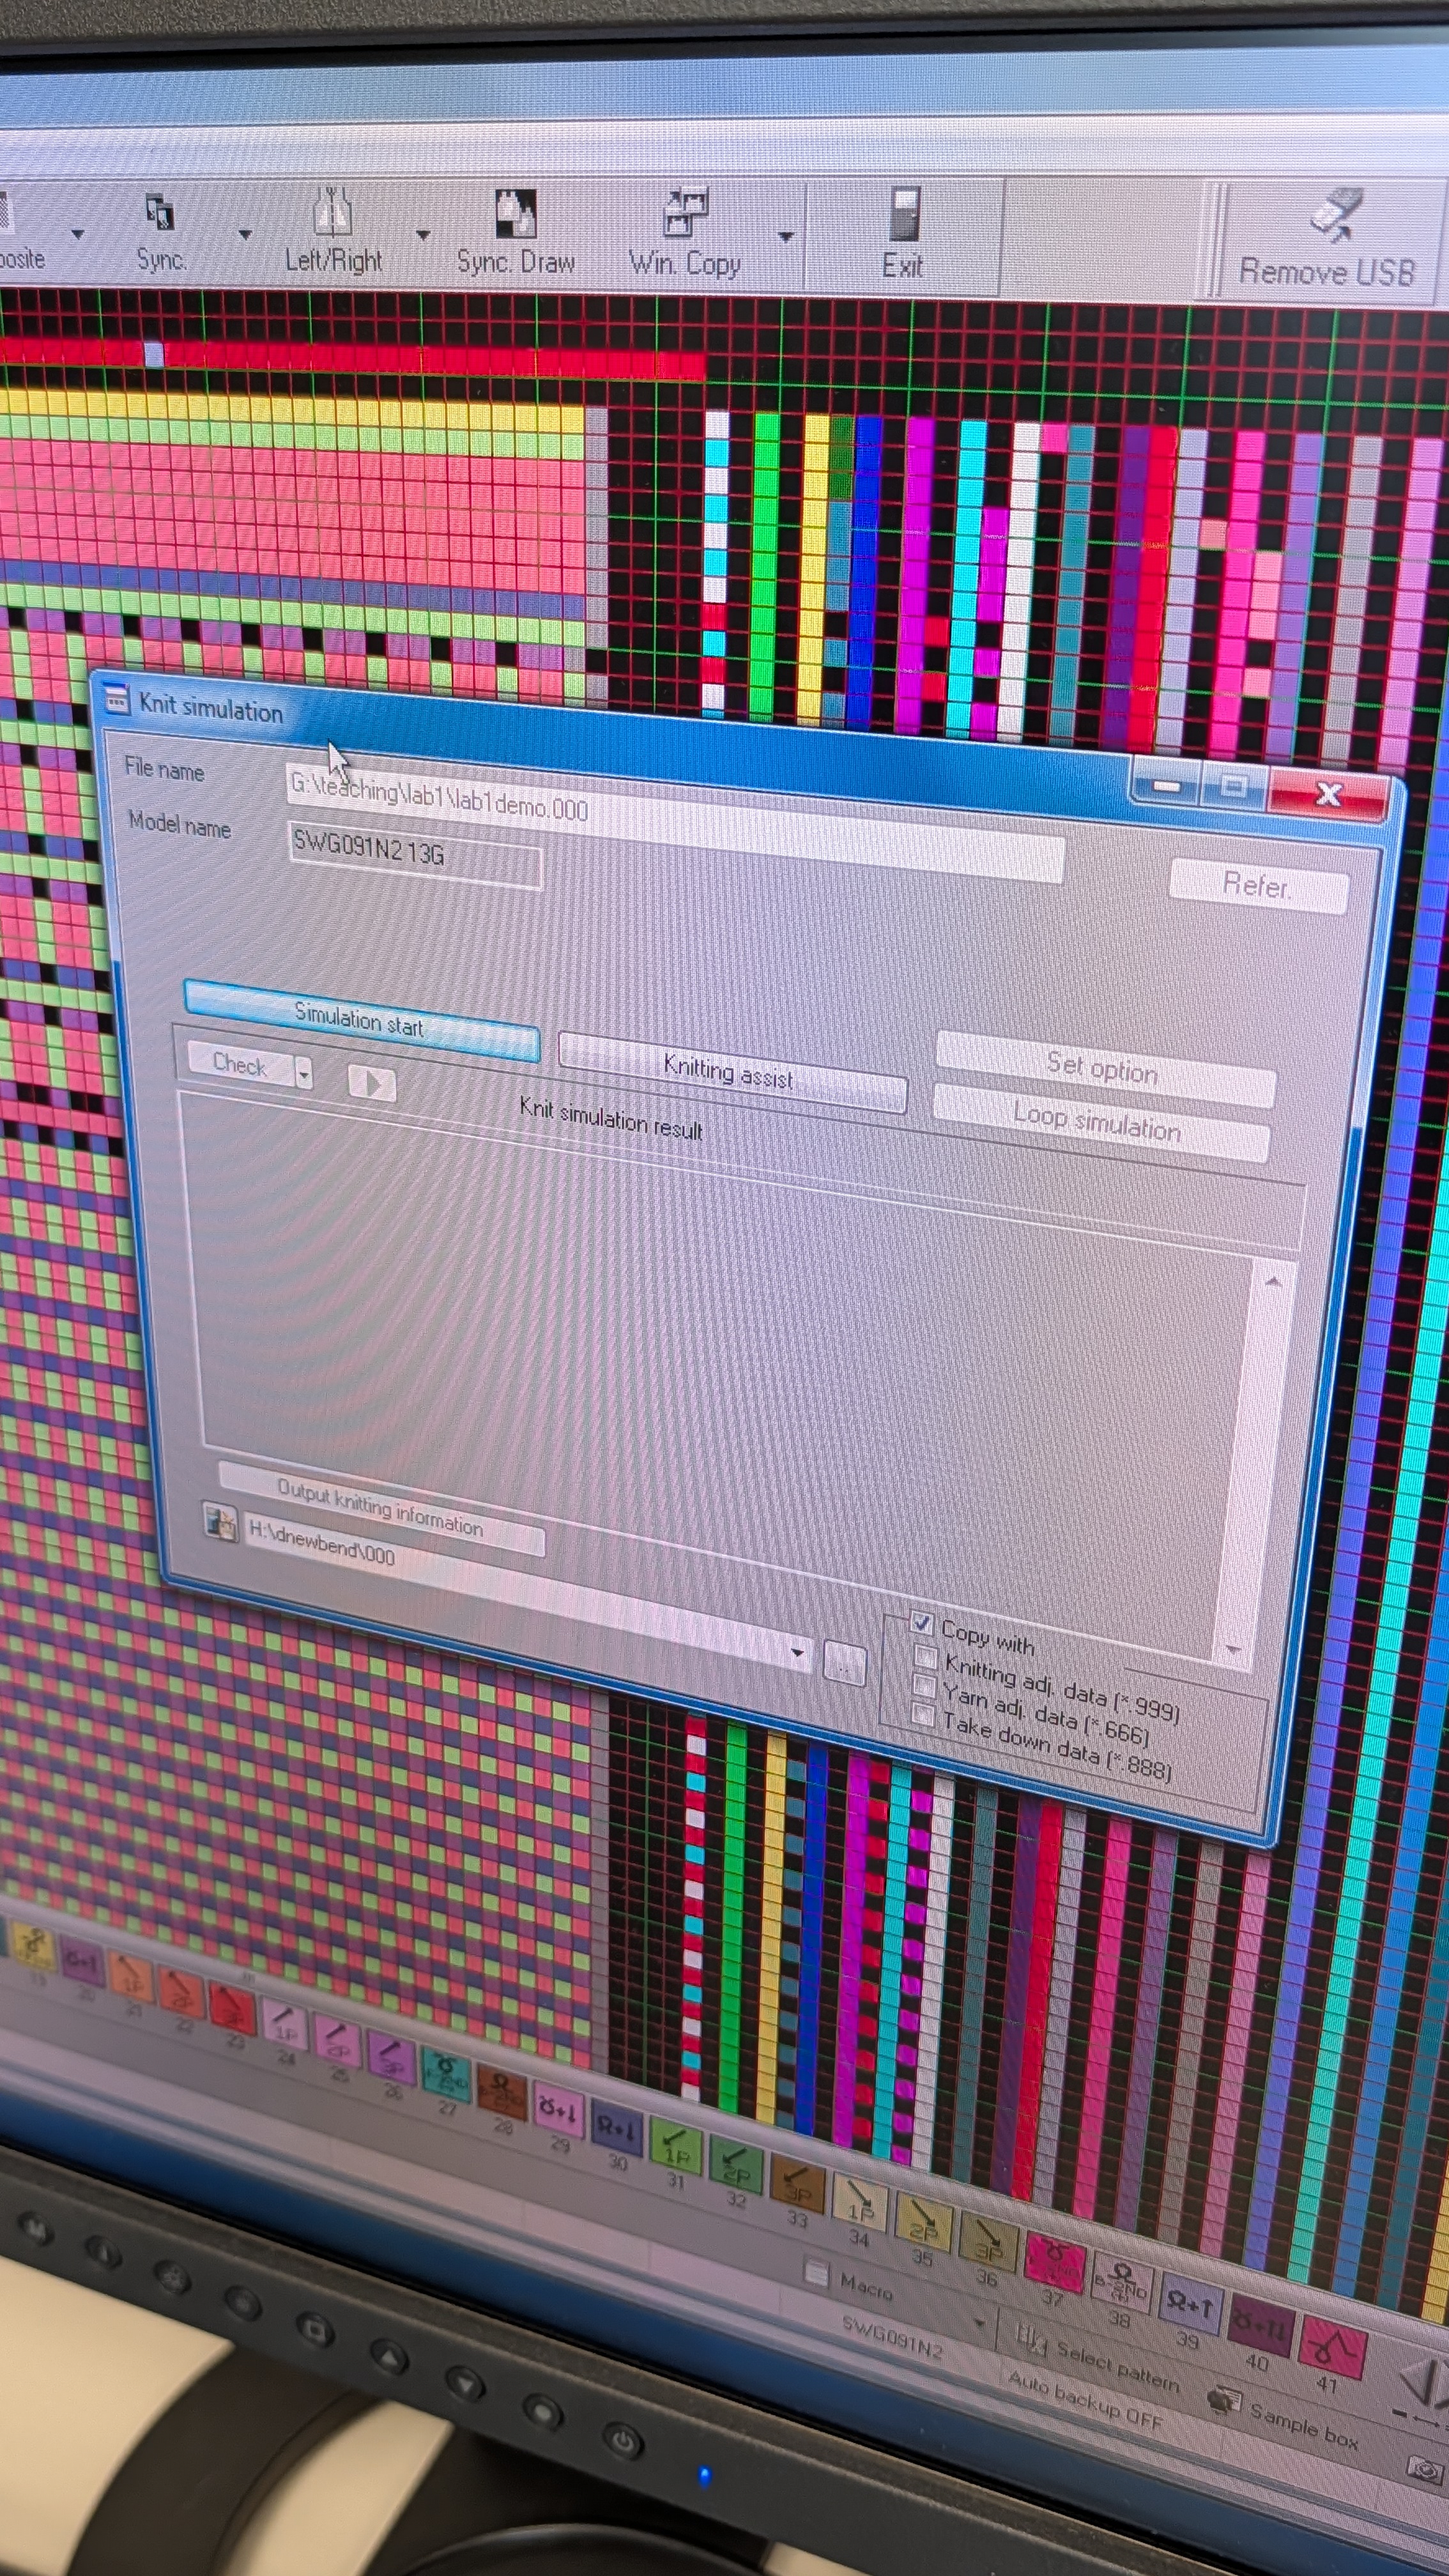
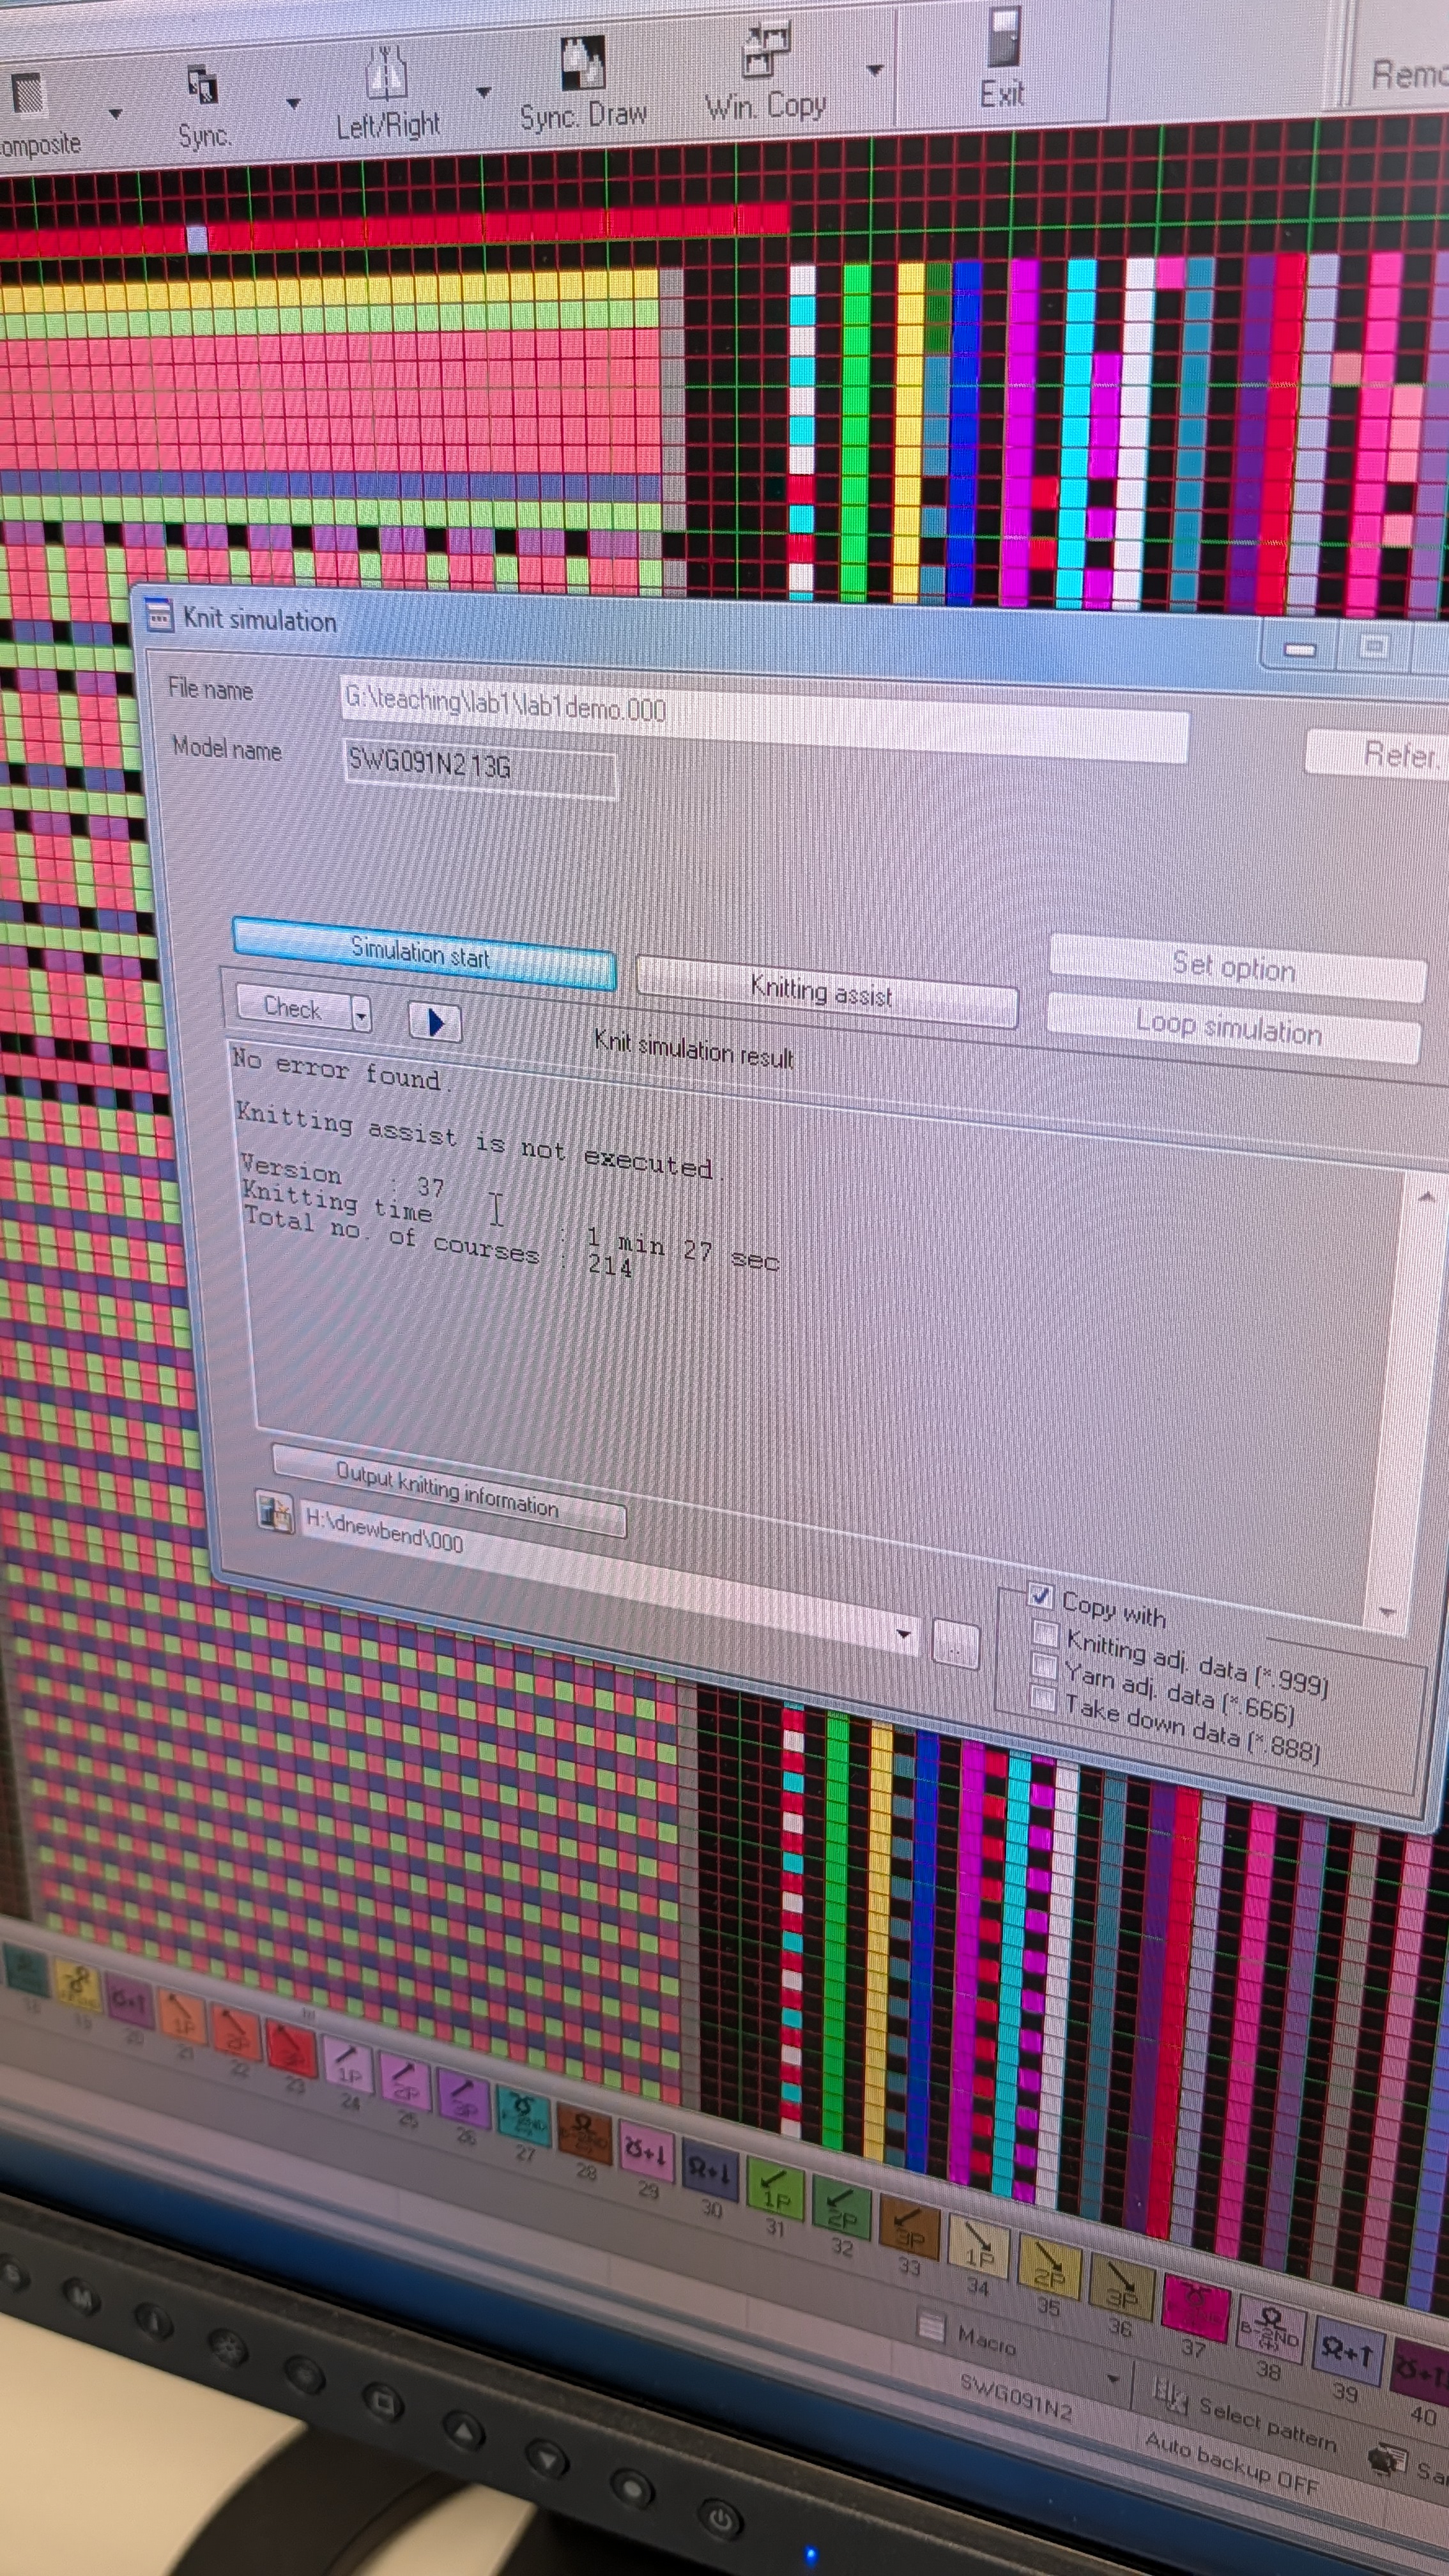
Now you will see the dialog about Knit Simulation. Click “simulation start” to see if there are any issues.
-
Then click “Knitting assist” to see if there’s any assist information. Usually they represent places where errors might happen but the machine can still knit with those errors (it just might produce items with holes or run into yarn errors).
-
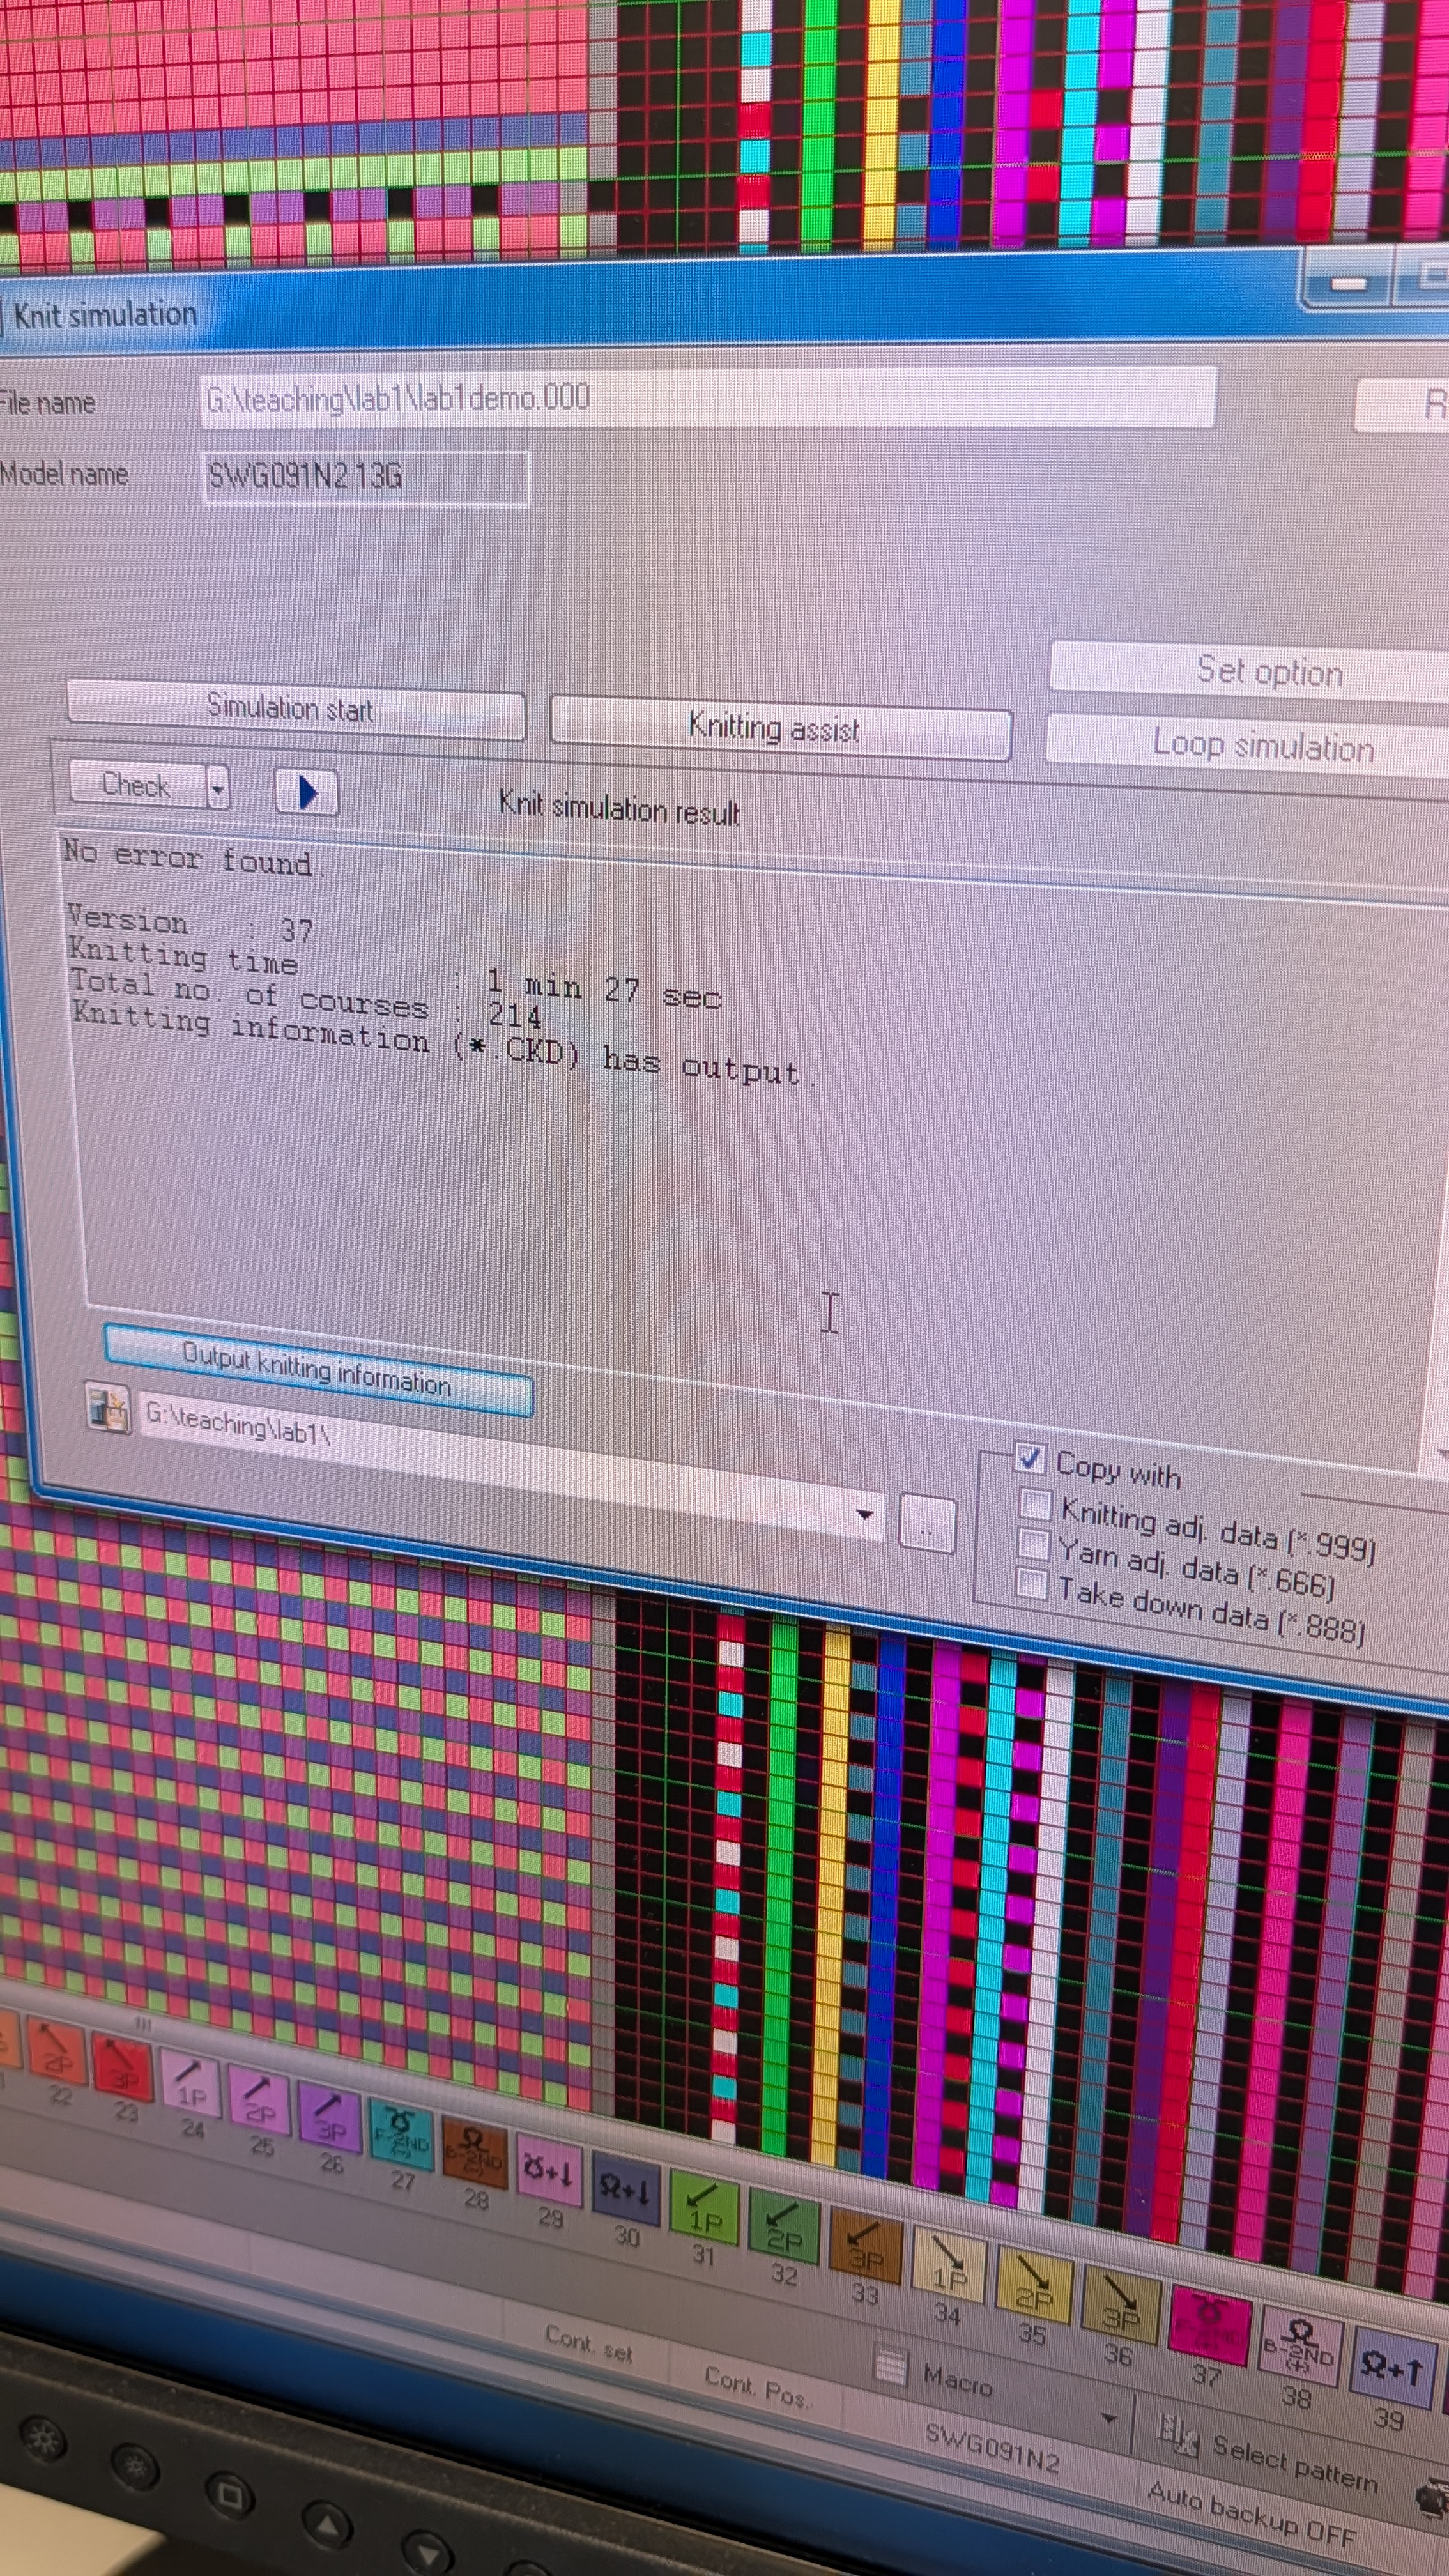
(Optionally) You can output knitting information, which can be viewed as you are knitting from the machine digital panel on where you are in the pattern.
-
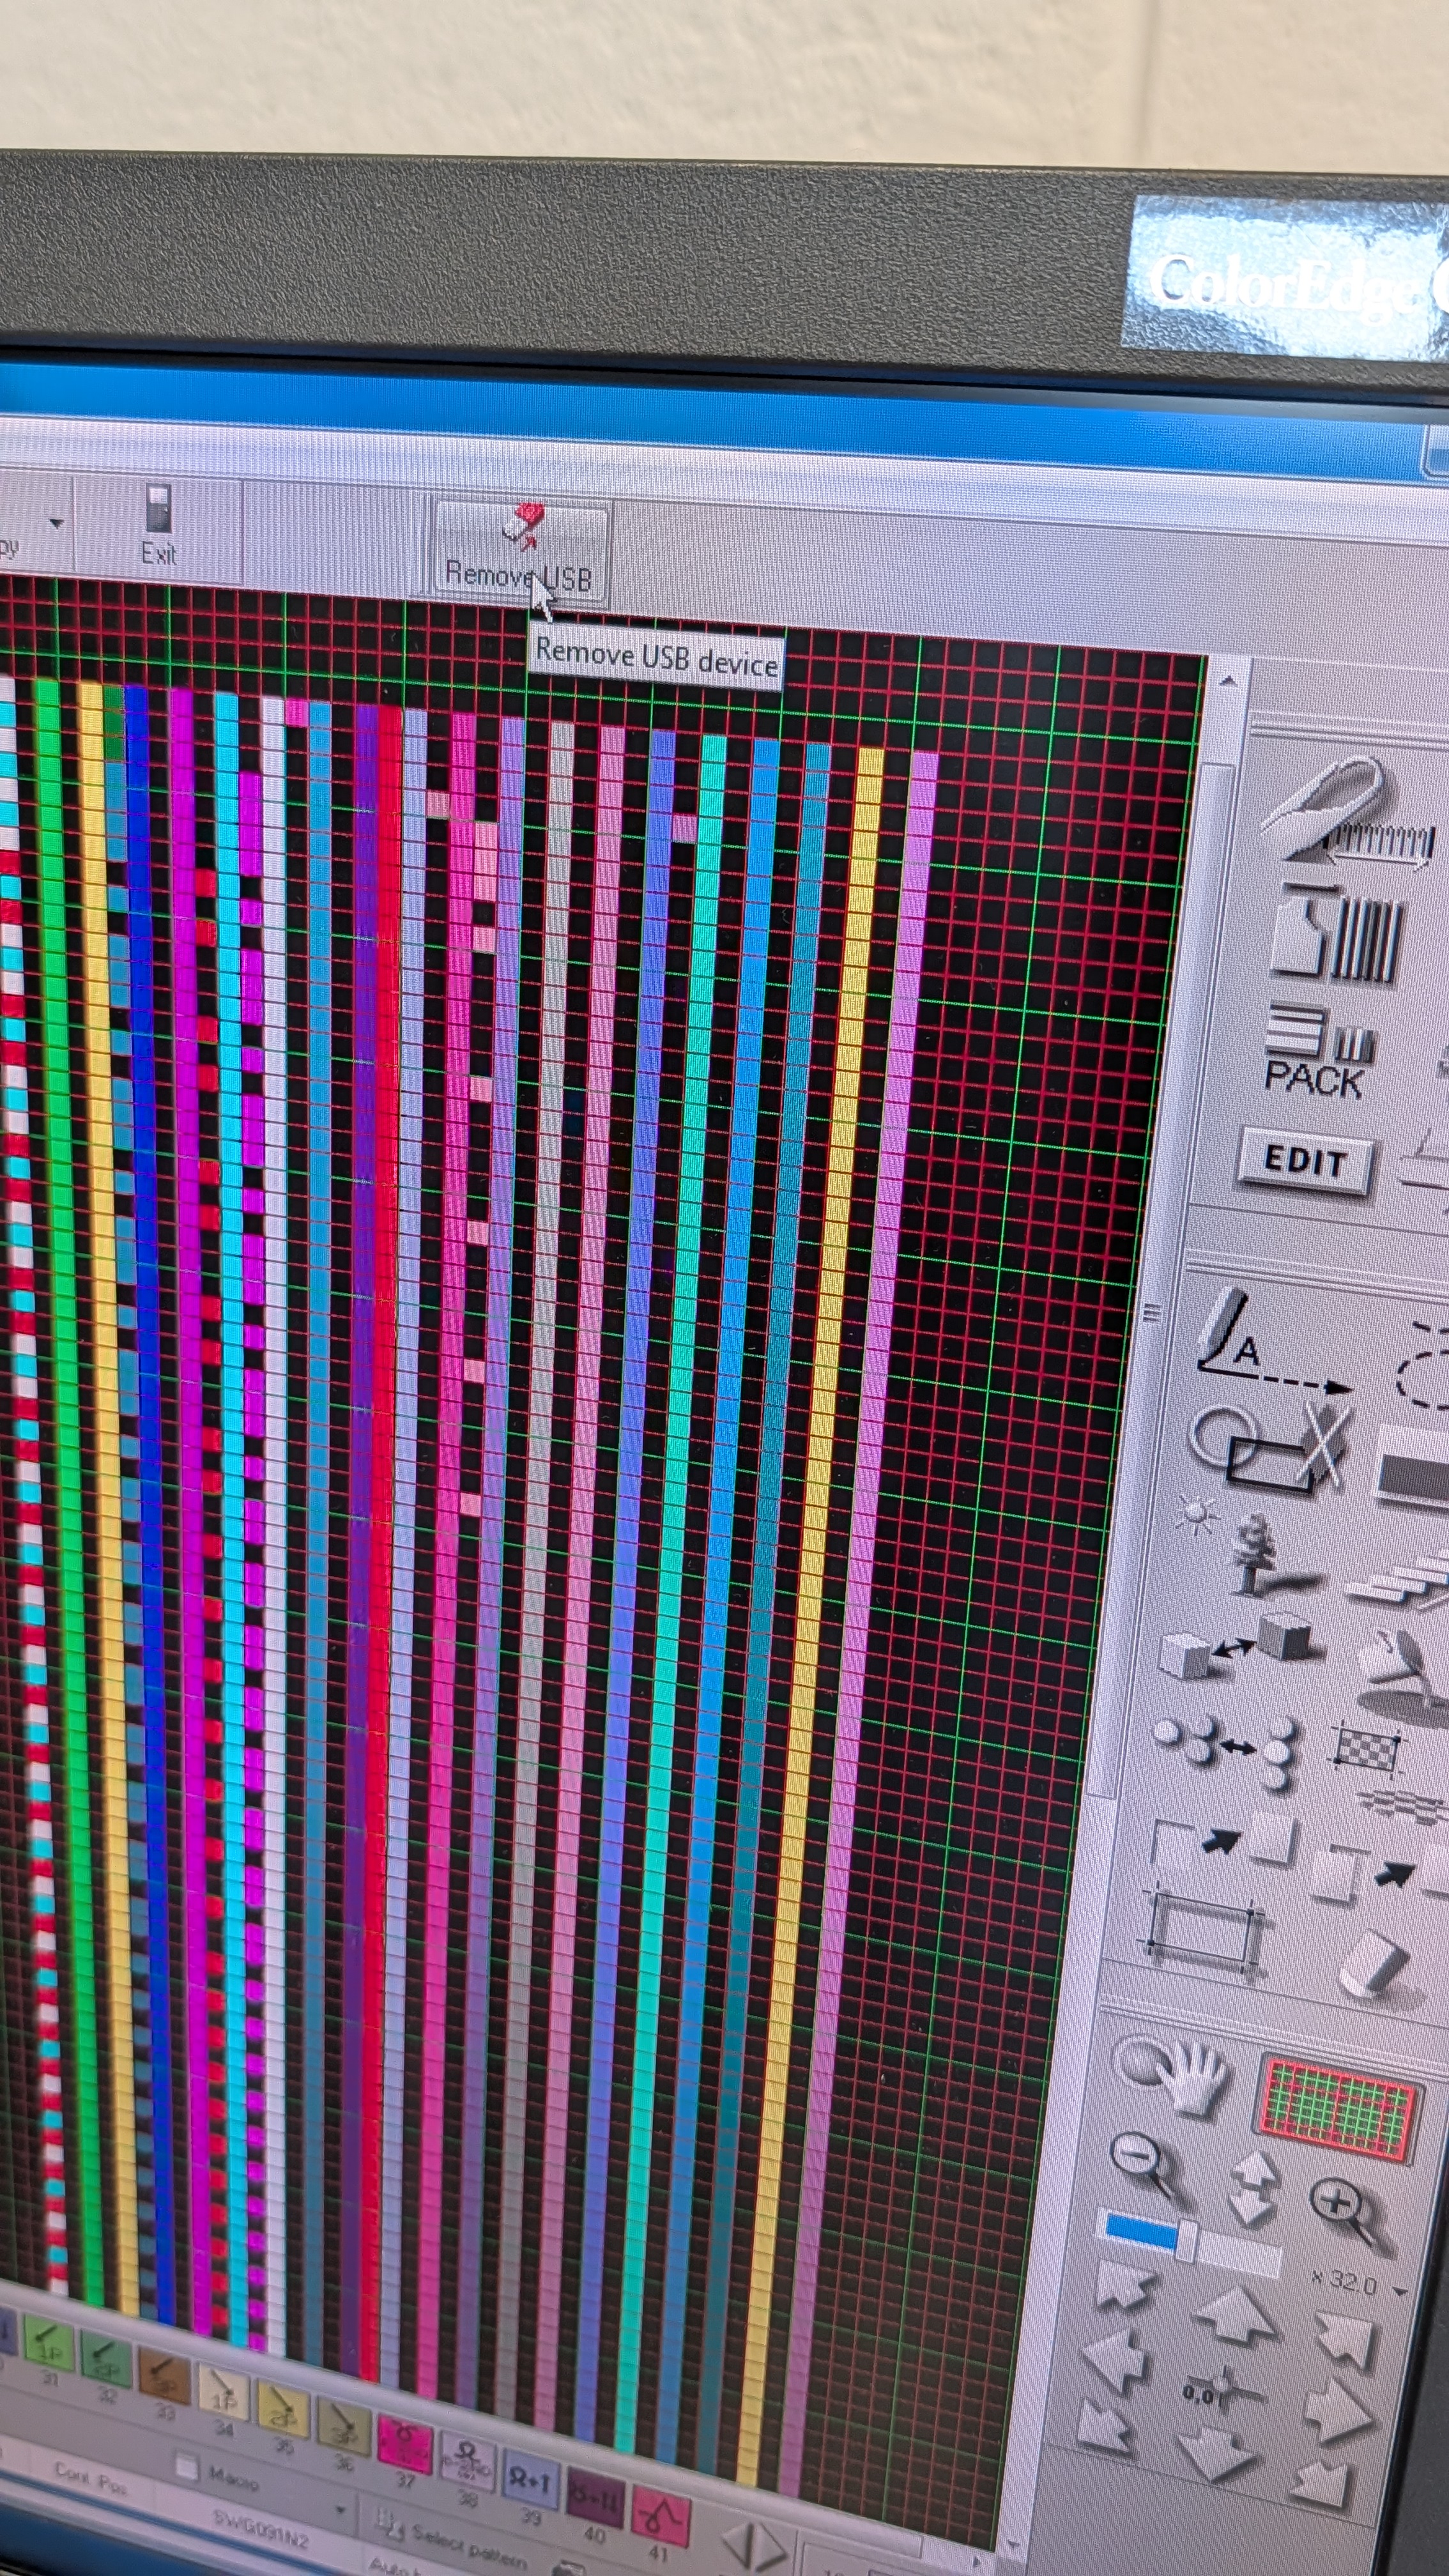
Now you are done! Simply click “remove usb” at the top to eject the USB.
Load the Pattern onto the Machine and Knit
Per the current setting on the machine, every time it finishes knitting it will run needle training automatically, which does some back and forth movement of the carriage on the machine to make sure needle movement is working well.
Taking the Knit Piece off the Machine
If the knit piece is too small, it might be difficult to drop from the bottom opening of the machine. Ask the lab technician or a TA/instructor to help or just wait after another piece is knitted that will usually push the previous piece out. You can follow the External Tutorial Page but it is less recommended.
In the case where the knit piece is still on the needle bed (i.e., you see yarns still from the top of the machine), we can do “Press-off Knitting” to press the piece off the bed. You can find the instructions from one of the manuals on the rack or ask the lab technician or a TA/instructor for help.
Common Errors
The knitting machine may report all kinds of errors and some category are benign warnings:
- If you open the front or back safety covers (front one is lighter and back one is much heavier, please be careful and hold onto the cover while you open it if you need to do so when threading the yarn), an error pops up warning about the cover being open.
- If a yarn breaks and flies off, or if the yarn is too loose and the tensioning device gets triggered, detecting the yarn error, and it will report the error. You can simply re-thread the yarn or increase the tension.
- A piece finished knitting, or every time after you hit “Prepa” with the fourth option, an error saying “1 piece finished knitting” or “finished” will pop up.
These types of errors can be safely ignored and you can just hit “CANCEL” and resolve anything if needed.
Other kinds of errors are more serious or cryptic. You can consult the error messages list booklet on the rack but the booklet itself is also rather cryptic. In the case that something other than the benign types happens, take a photo and record it before you hit “CANCEL”. Ask the lab technician or a TA/instructor for help.
What if an error occurred in the middle of knitting?
Unfortunately there is little chance of rescuing the piece if an error occurs in the middle of knitting. What can be done is as follows:
-
Push any active yarn carriers back to the right side.
If the yarn did not break, the yarn threads should still be connected to the knit piece. In this case, open the safety cover and manually secure the threads into the corresponding yarn holding hooks (see the content of the last few steps in Threading the Yarn).
-
Do the same prep for starting knitting (step 3 in this External Tutorial Page).
-
(Optionally) Run press-off knitting to press any remnant piece off the machine, or just hit the green button and let the same pattern only runs until right before any yarn carrier starts moving, which does similar things as the press-off.
-
Thread any yarn back if the error was the yarn breaking in the middle of knitting.